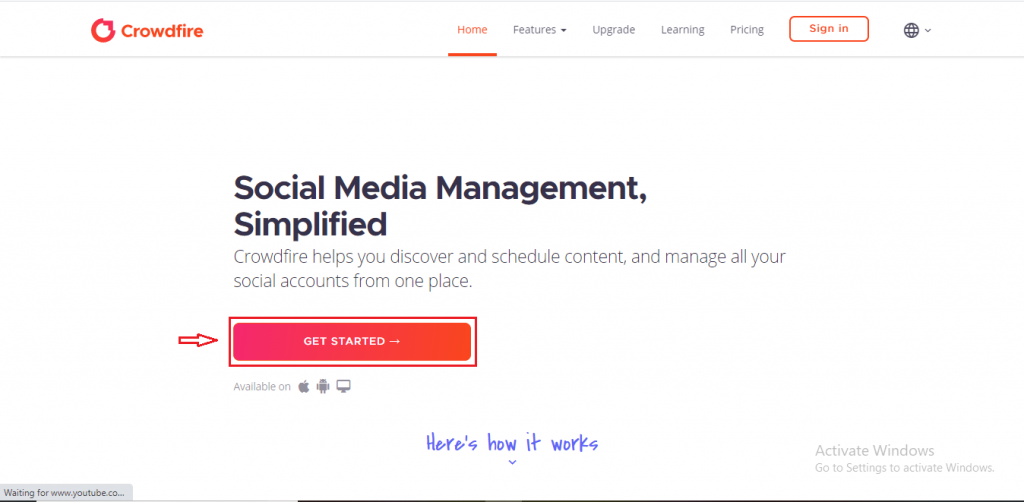
Crowdfire is a Social Media Management tool that helps you grow online every day. It offers Social Media scheduling, Engagement, Analytics, and Social listening. It saves your time by managing all your social accounts content from one convenient place, rather than logging in and out, copy/pasting content between apps, and so on. It not only supports social media channels but syncs up big names like Etsy, Shopify, Vimeo, and others. Also, it offers a 14- day free trial. Crowdfire is available on Android, iOS, and Web. It’s super simple to get started, all you have to do is log on to www.crowdfireapp.com, and click on Get Started.
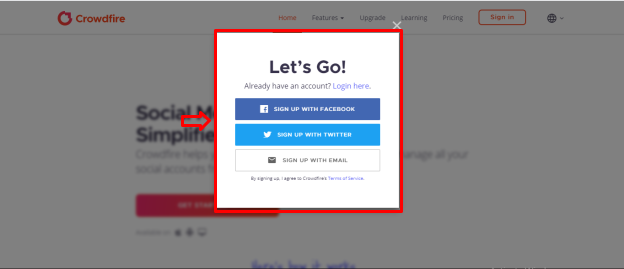
You are then directed to the sign-up page where you can either sign up with your Facebook or Twitter profile or via your email.
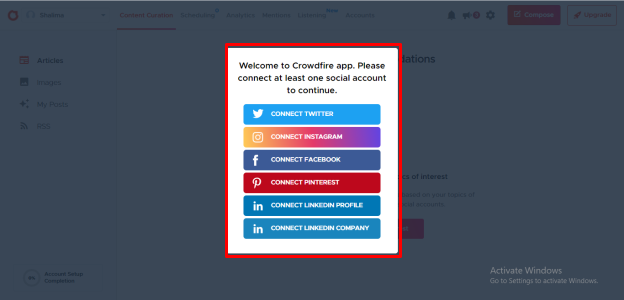
Once you sign-up, a pop-up will appear where you need to connect at least one of your social accounts to continue. You can connect more accounts later.
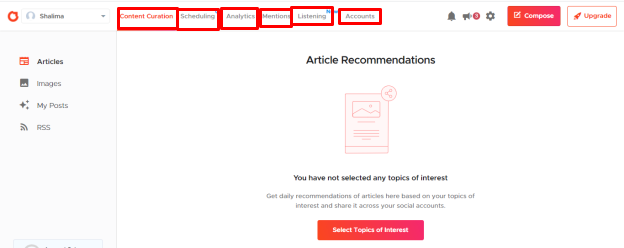
After connecting, a dashboard appears where you can find a menu tab with options for Content Curation, Scheduling, Analytics, Mentions, Listening, and Accounts.
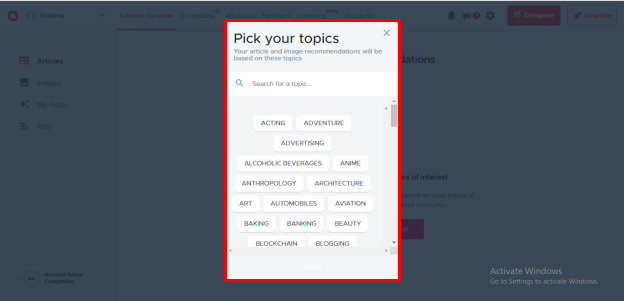
Next, you can select the topics based on your interest. Either you select from the topics already given or else you can search for any other topics and click on Save. You can select up to 15 topics.
Let’s start by explaining the options individually.
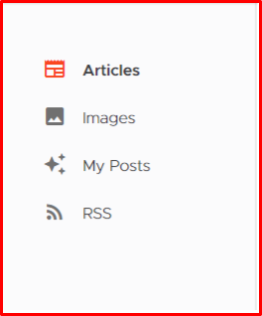
The Content Curation tab helps you to keep your timeline active and to engage with your followers. It makes our work easy. The most difficult part of any digital marketing strategy is finding relevant content. Content curation includes discovering, gathering, and presenting content created by others. Under the Content Curation tab, there are four options: Articles, Images, My Posts, and RSS.
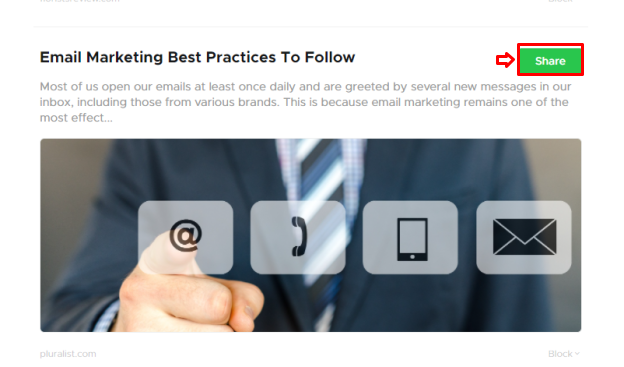
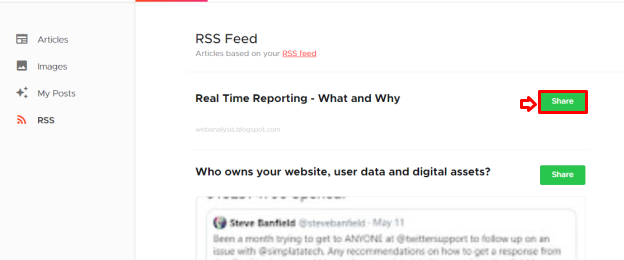
Click on the menu Articles to fetch relevant articles based on your topics. Select one of the articles and click on the button 'Share'.
After that, you can add accounts to post the article by clicking on the '+ icon' at the bottom and you will see the preview of your posts on different accounts. You can also edit the posts by clicking on the 'pencil icon' on the top right corner of your post.

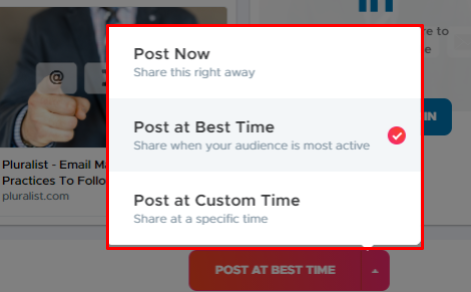
Then click on the 'post button' and select a posting option. There are 3 options to choose from. They are posted now, post at the best time, and post at a custom time.
Next click on the menu Images to fetch relevant images. It recommends fresh, relevant images often to keep your social media accounts active and get you the right followers.
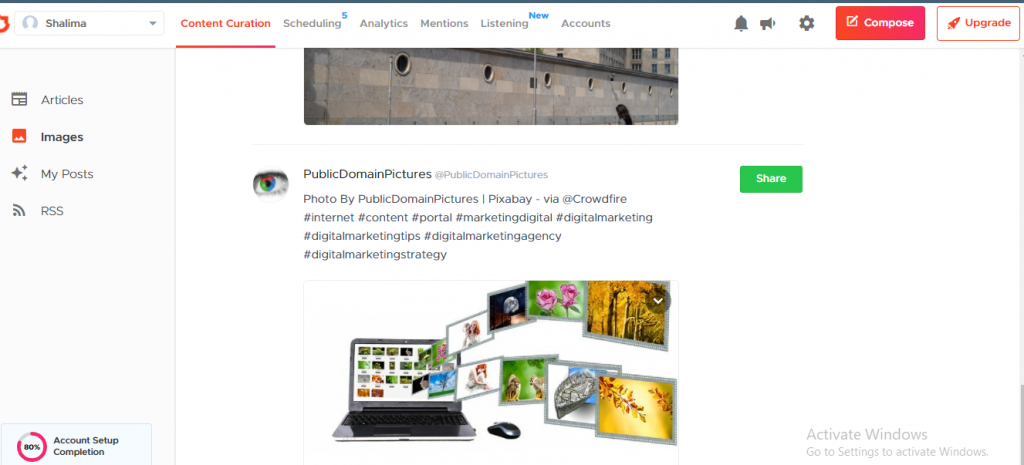
You can select the images based on the topic you are going to post and then click on the button 'Share'.
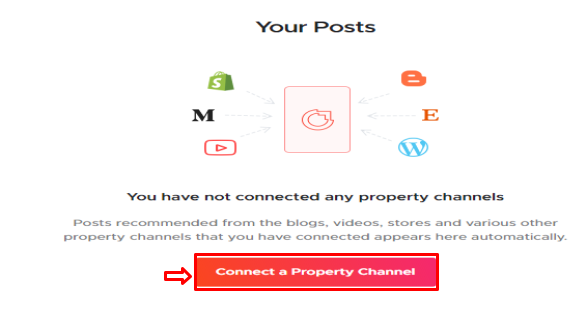
Next comes the My Posts menu where you can promote new items from your online shop, YouTube channel, or blog using social media platforms at once and also you can bring more traffic. To activate this, connect a property channel by clicking on the button 'Connect a Property Channel'. If you don’t have a website, blog, or shop, then you connect your YouTube channel.
Once you connect, Crowdfire automatically posts up with recent content from your platforms into the My posts tab. So that you can share the contents to different social accounts by clicking on the button 'Share'. The tool provides a notification to everyone when you add a new video, blog post, or a product next time. So that it will be easy to post everywhere with just one tap.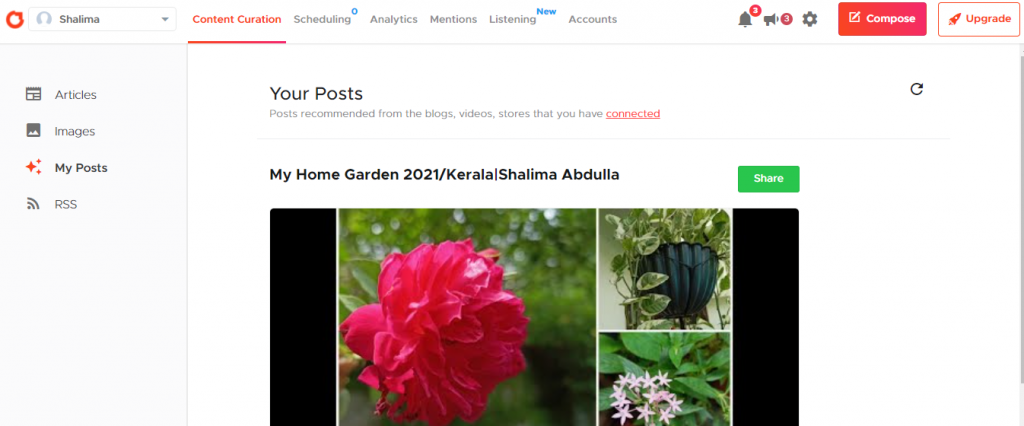
The next sub-menu is RSS, the latest posts are displayed in the RSS feed. For adding a new RSS feed, click on the button 'Add RSS Sources'. RSS feature allows you to access fresh daily content from your favourite blogs and websites.

Then you can view the post and also for sharing the post to your account, select any of the posts and click on the button 'Share'.
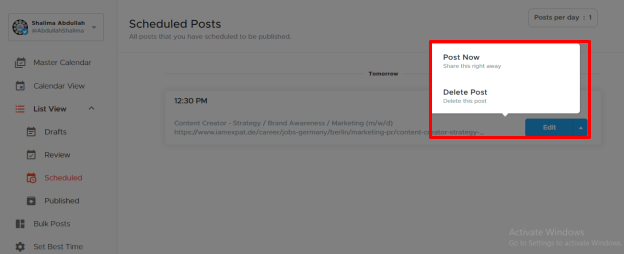
The next tab in the dashboard is Scheduling. Tap on the scheduled scheme to access the scheduled posts and also you can check out all your scheduled and published posts. Besides, You can schedule a list of posts by simply using the Bulk Post Feature and also you can edit, delete, and share the post.
You can also see a calendar view of your scheduled and published posts.
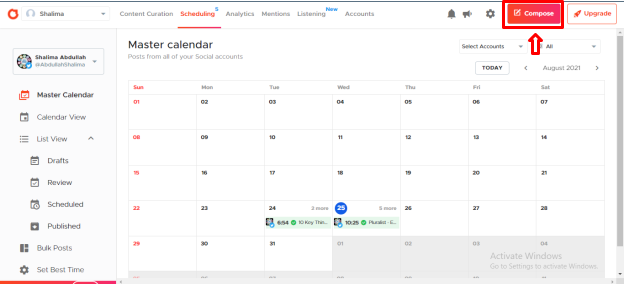
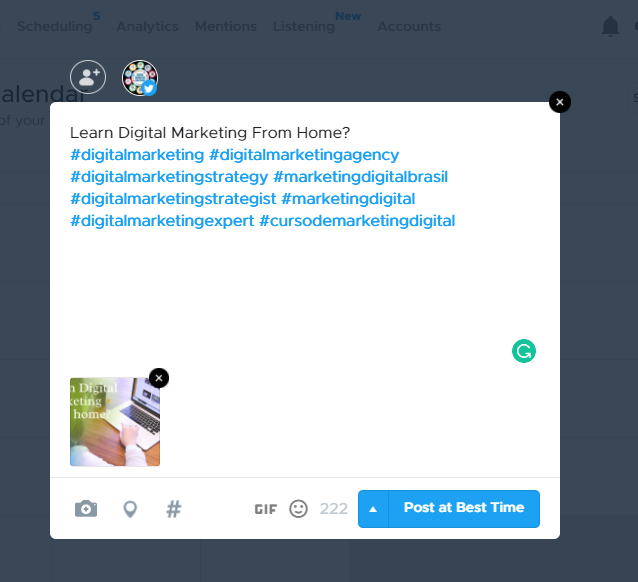
With Crowdfire, you can also schedule your own content for all your connected accounts by tapping on the 'Compose' button on the top right corner of your Crowdfire dashboard. You can select accounts where you want to post and then type your content, upload an image or video and the next step is to choose a posting option and click on post.
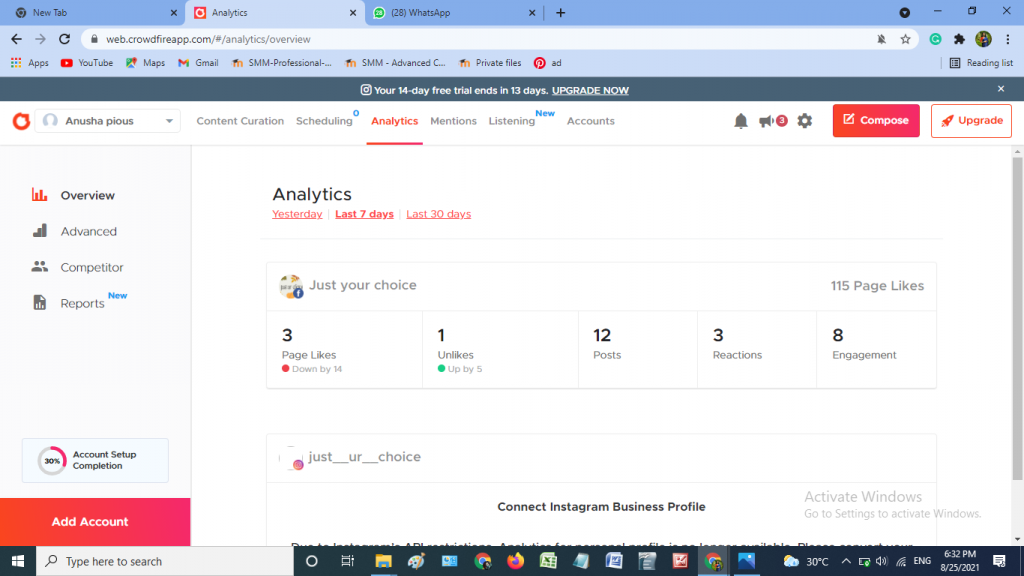
The Analytics menu gives a detailed analysis of the social media accounts you have connected such as reach, engagements, posts shared, followers, etc. Under the Competitor tab, you get a clear view of where you stand as compared to other companies in your field. Below that there comes the Reports tab, where you can build custom professional reports with the data points that you want to highlight.
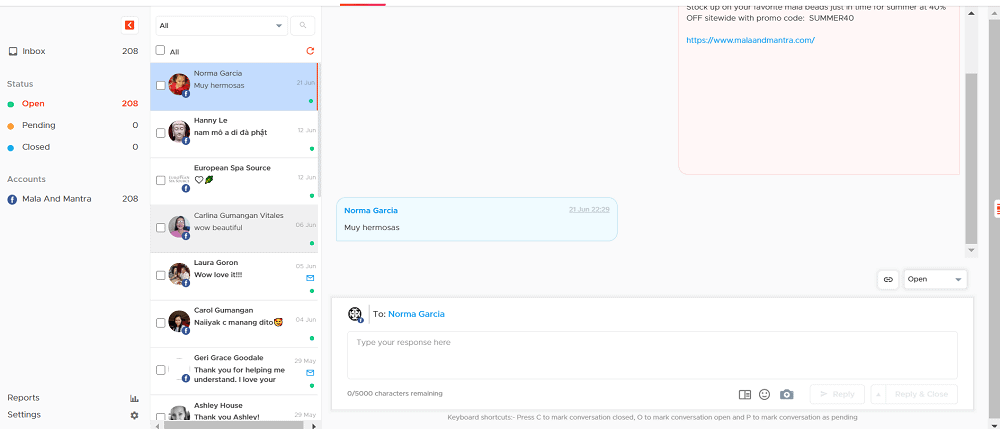
The Mentions tab is used to track easily, manage, and reply to your social mentions from your connected accounts with images, videos, and gifs.
In the Listening tab, you can easily analyze your positioning against your competitor’s social accounts and this is a new feature for premium members.
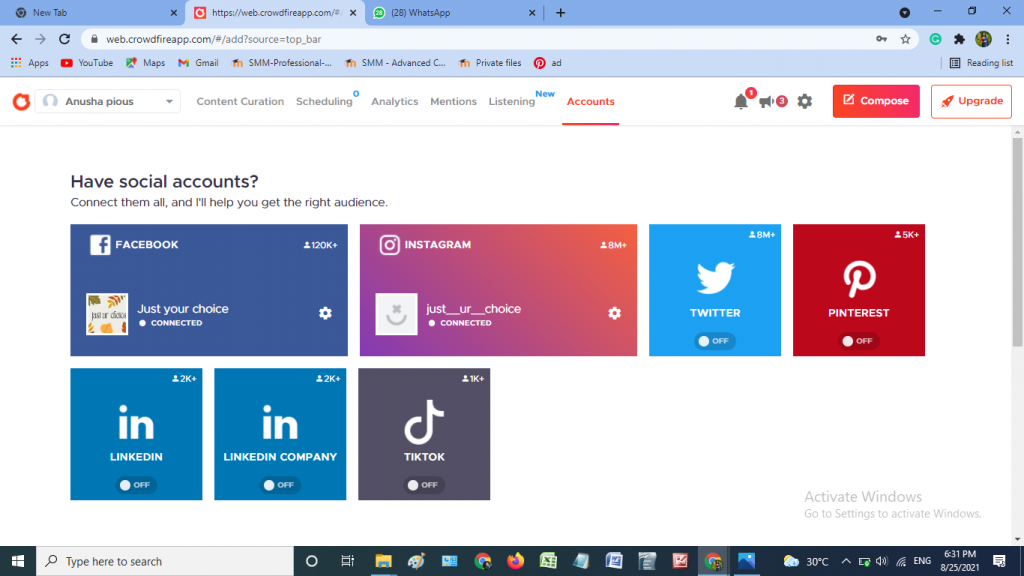
You can see all your connected social media accounts and your property channels and also you can connect more accounts here.
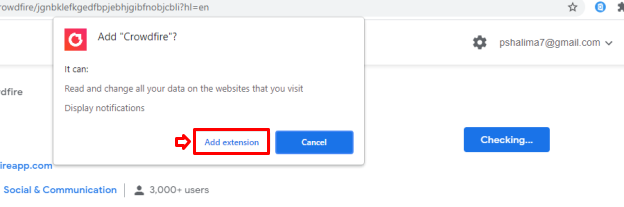
Crowdfire is used as a Chrome Extension, using this extension you can share the content easily and quickly. Chrome extension allows you to open the published posts from any web page and schedule the post right away. For extension go to the Chrome Web Store and search for Crowdfire., where you can find the button ‘Add to chrome’, click on that.
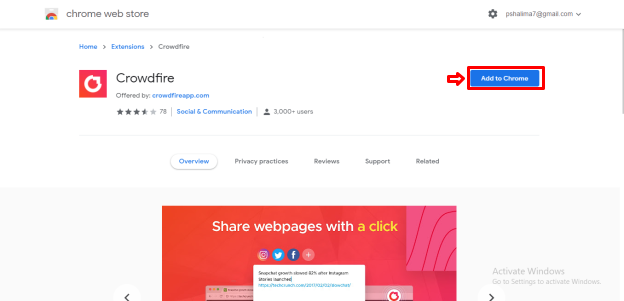
Then a pop-up message will appear, click on ‘Add extension’.
After adding the Crowdfire extension, if you find an article or a blog post on a particular website that you would like to share, first of all, you need to do is click on the Crowdfire icon on the right side of your browser.
This will open up the tailored posts composer on your page which allows you to create unique messages for each of the social accounts that you were sharing. The title of the page along with the link will be automatically posted and for that, you need to select the accounts and schedule.

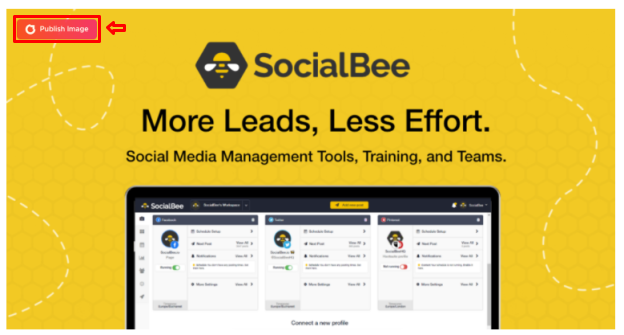
You can also use this extension to share images. If you find an image on a page you would like to use in your post, simply place the arrow on the image and click on 'publish image' or else you can right-click on the image and clock on publish the image.
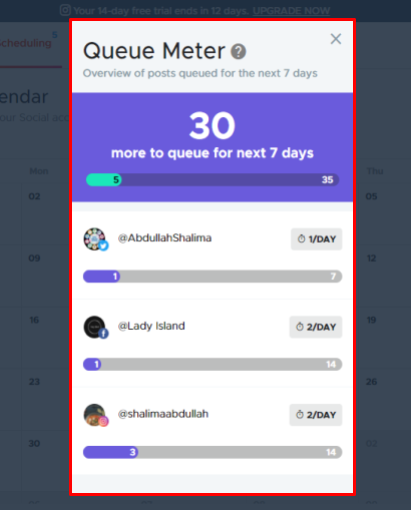
For any social media account, to keep the audience engaged it’s important that new content should be published on the timeline at least every day. The Queue Meter allows you to keep an eye on your queued posts for each and every social accounts you have connected and also ensure that there is at least 1 post scheduled to go out for the next 7 days.
Before you start, make sure your frequency for the number of posts that you want to share every day.
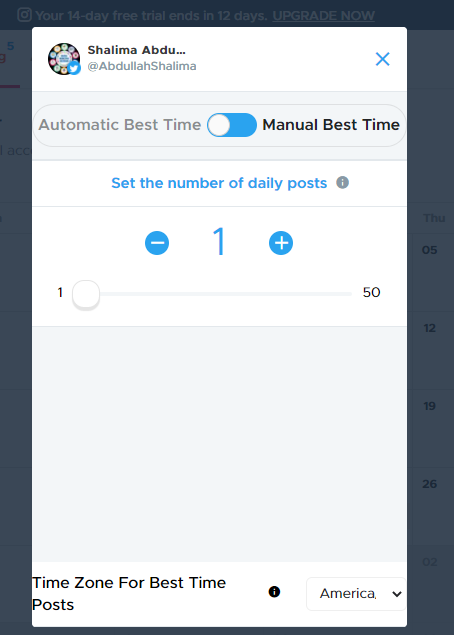
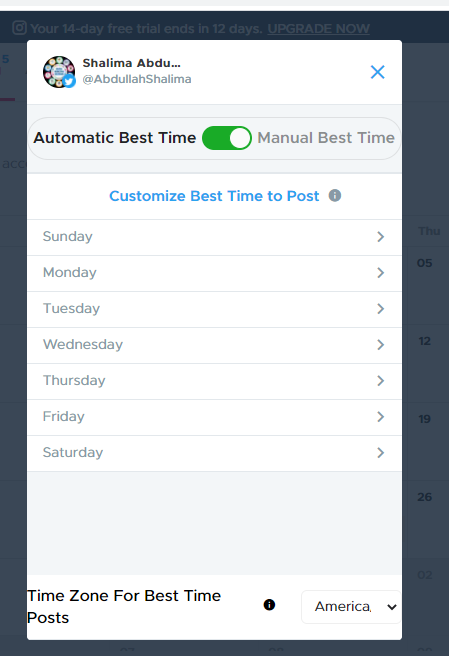
Crowdfire calculates your best time based on certain features. You can also customize your best time to post, add a specific time and date using the manual best time option. Otherwise, you can access this feature through the queue meter by selecting a social account.
Also, you can access this by clicking on the 'post per day' inside the scheduled tab.

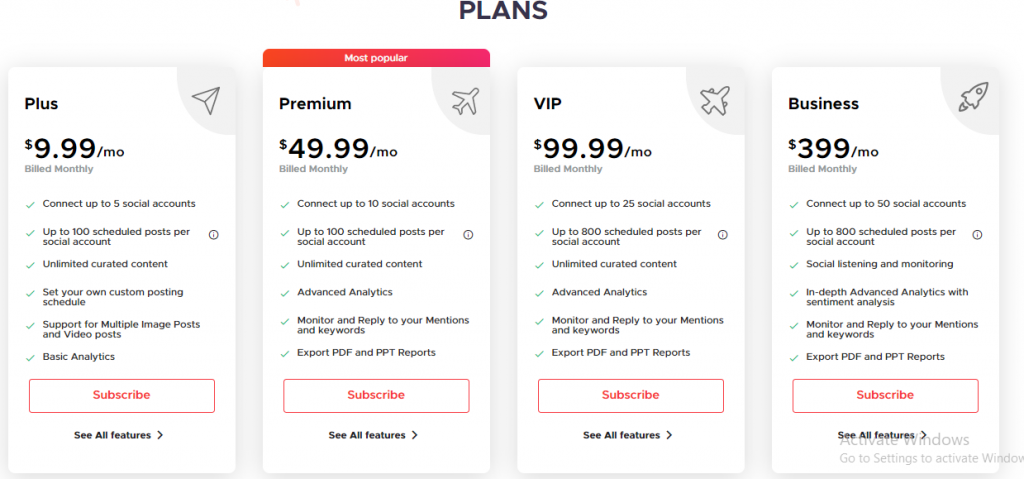
In the Crowdfire extra features are available on the basis of the payment plan that you choose. Here are some payment options that will help you use Crowdfire to its maximum ability.
Crowdfire is a user-friendly social media management tool to create and schedule posts for all of your social media accounts from one dashboard and also it features content curation tools to help you discover new articles, images, RSS feeds, etc... to share. Therefore by using Crowdfire you can easily manage your social media accounts.