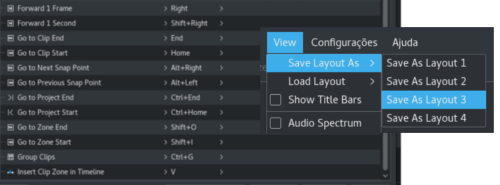
Kdenlive is an open-source video editor. It was introduced by Jason Wood in 2002 and designed to edit the videos, from basic video editing to professional work. In Kdenlive, multi-track video editing is possible. We can use any audio or video format in it directly. It has a configurable interface and shortcuts. We can arrange and save your custom interface and layouts to your workflow. We can configure keyboard shortcuts to match your preferences. Kdenlive, KDE Non-Linear Video Editor, integrates many plugin effects for video creation. Furthermore, Kdenlive has a built-in title editor. With the tools to create-move-crop- and delete video clips, audio clips, text clips, and image clips, we can use it as a complete studio for video creation.
It is safe to download kdenlive in Windows, Mac, and Linux. But we should download it from its official site. It is a free and open-source multimedia editing software. So we are free to download it. Using its tools, music manager, and effects and filters for creating videos, even children can edit and create videos within 15 minutes.
To download kdenlive, visit its official website, www.kdenlive.org. We will reach the landing page. Click on the download button and click install
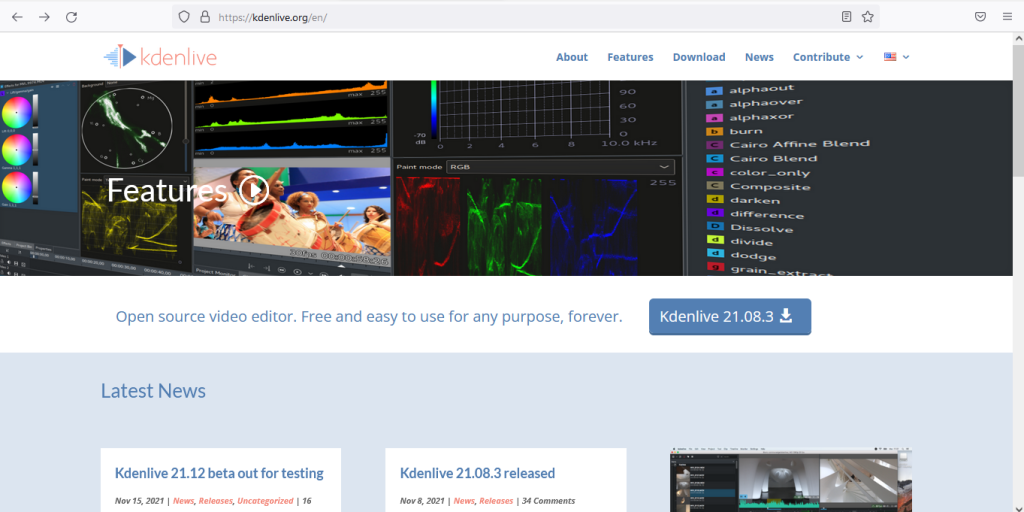
For further information to download kdenlive, visit the site:
https://teckangaroo.com/how-to-download-and-install-kdenlive-in-windows-10/#2
After the installation, go to the Start menu, search for Kdenlive, and click on the application. We can open the software as shown below.
We can change the theme for our convenience to do a project. Go to Settings in the Menu bar and change the theme of your choice.
If you want, you can change to the dark theme: Settings ‣ Colour Theme i.e Breeze-Dark and if you want a light theme, change it to Breeze-Light.
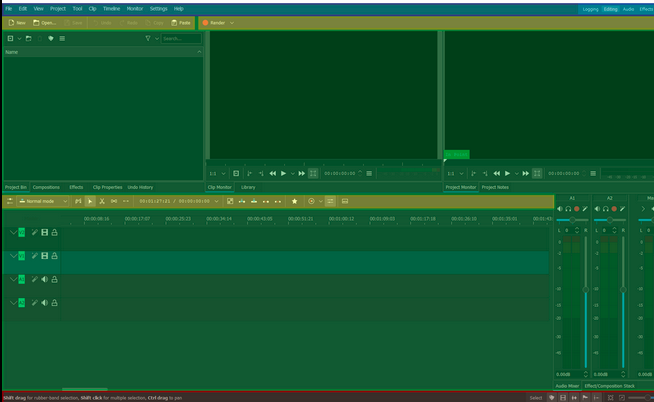
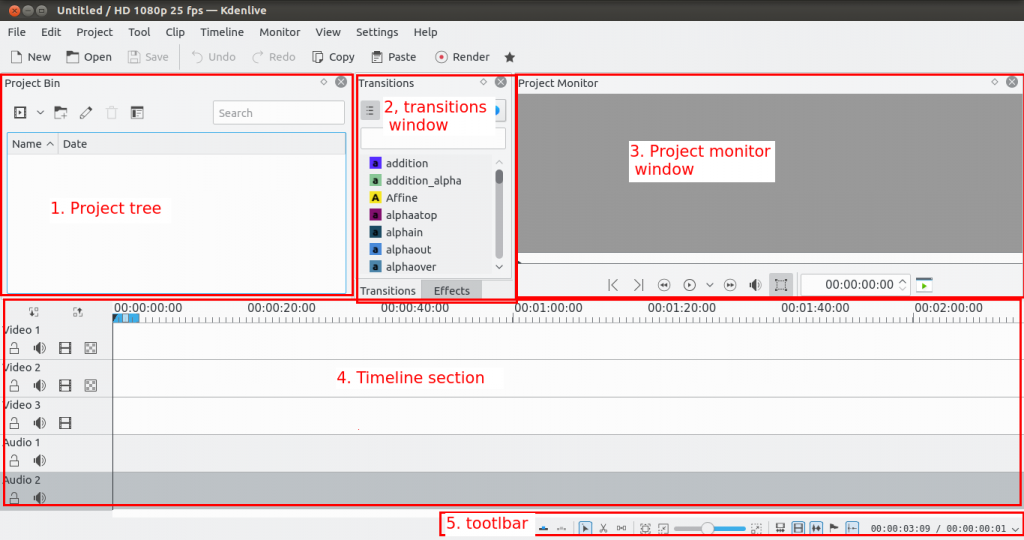
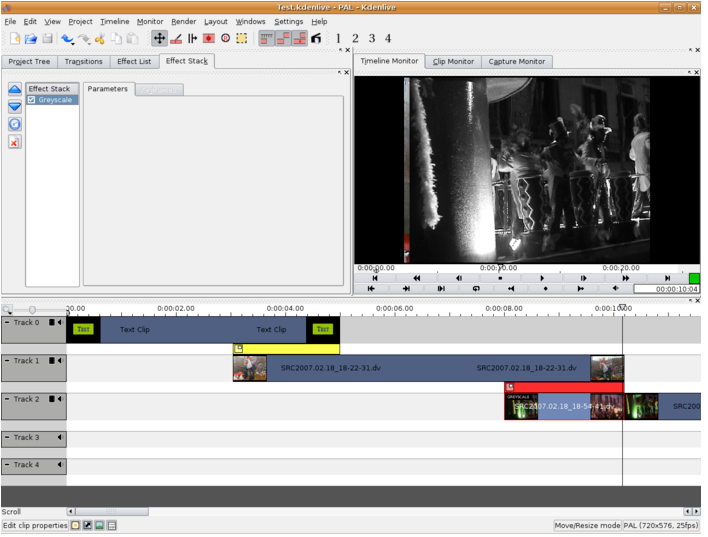
The above theme will give us a clear view of the interface. The Project Tree Part is the project bin to carry all our clips for editing. The second is the Transition Window, in which there are a lot of transition effects to the clip. It is a remarkable feature of kdenlive. The third part is the Project Monitor window, where we can see the track view of our editing. It is a mini Cinema in this software, as we are getting a preview of our edited Video clips. The Fourth part is the timeline area where we can see the time view of different times duration of our Videos, in hr:mts:sec: frame order. The fifth part is Toolbar, where all the tools for creating the videos are kept.
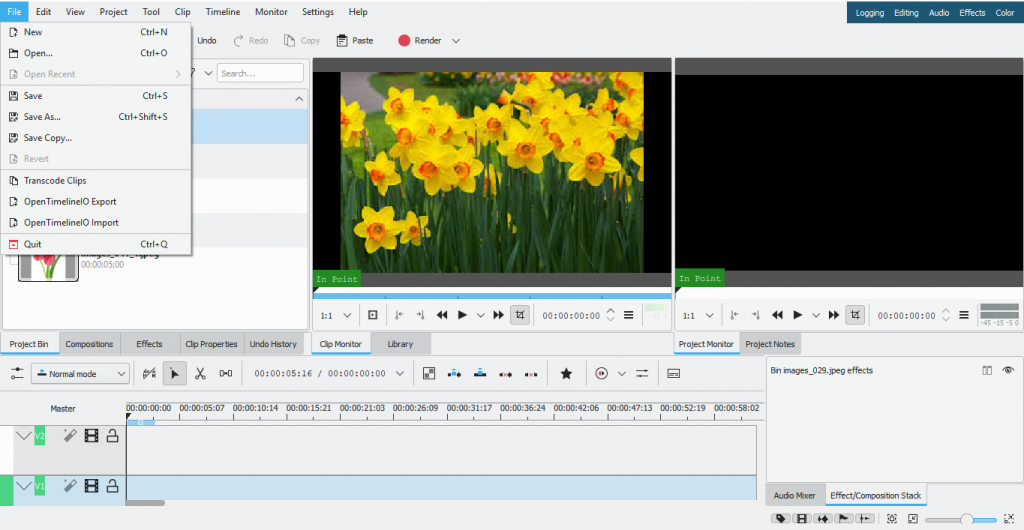
Before starting the Project we must do some basic settings. We should take a new file to create a new project.
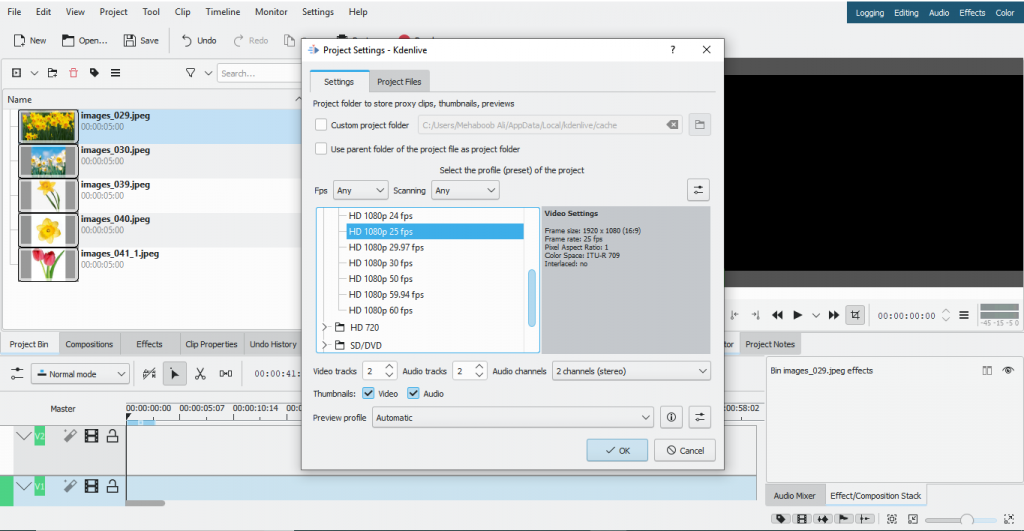
Click in the File menu of the menu bar as shown in the above image. Then click new. A drop-down menu will appear, as shown in the image below. From this menu select 1820*25fps, as the specification for the project file. Then click ok. Now the basic settings we needed for creating the Project are over.
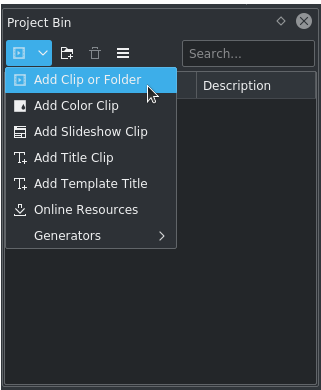
After taking the new file, we can add video and audio clips we wanted to edit to the Project Bin. To import clips to the Project Bin, click on the add clip option. Then select the add clip option from the drop-down menu. It is convenient to keep all the necessary clips in a single Folder to import. You can either import the clip one by one or import all clips in a single click, clicking Ctrl+A keys together.
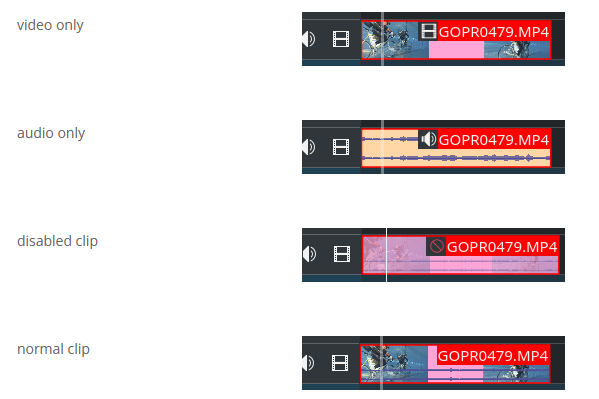
Next is Clip Management. Add the necessary clips to the tracks. Audio clip to the audio track and video clip to the video track. Here also we can add all clips in a single click. There are two different types of Tracks. One is Video and the other is Audio. Video tracks contain any clip. In Audio Track, an audio clip is used.
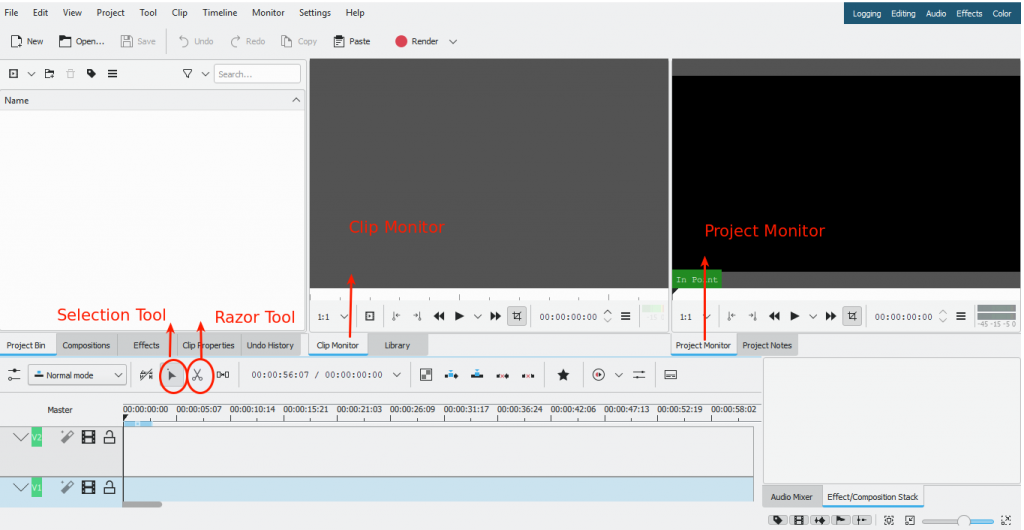
We placed the clips for editing, on the timeline. There are two types of monitors. The clip monitor shows video from the original clips and the project monitor shows how the output video performs, with all the edits done. We combine all the clips on the timeline to get the final results. It will be brought to the timeline by drag and drop. We can view the result by moving the play button on the project monitor. We can view the result of all the clips and their adjustments by clicking and dragging the rewind button and clicking the play button of the project monitor.
Saving a kdenlive project is an important task. Because the project can be re-edited or changed only when it is saved. To save it, go to File ‣ Save. But the saved project can not be displayed as a video. Saving it as a video is called rendering.
We can cut and remove, if there is any unnecessary part, using the selection tool and razor tool. But it is advisable to click on the Selection tool soon after cutting the clip or using the razor tool, click on the selection tool and click on the unnecessary part to select it. Using the delete button of the keyboard, we can remove that part. It is a fact that the razor tool is a dangerous one. Once it is selected, it will cut wherever clicked. So soon after using it, click on the Selection tool. Another thing to remember is that there is an undo and redo option.
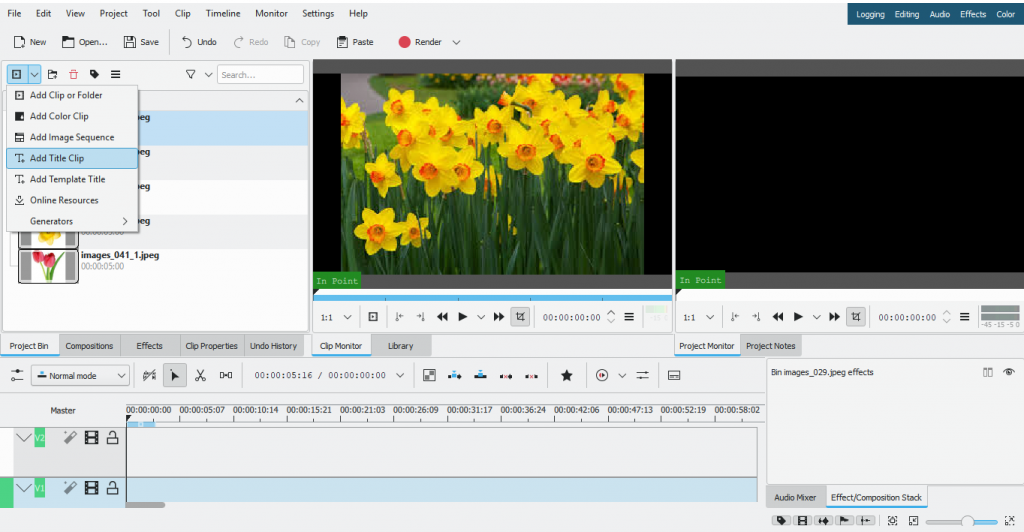
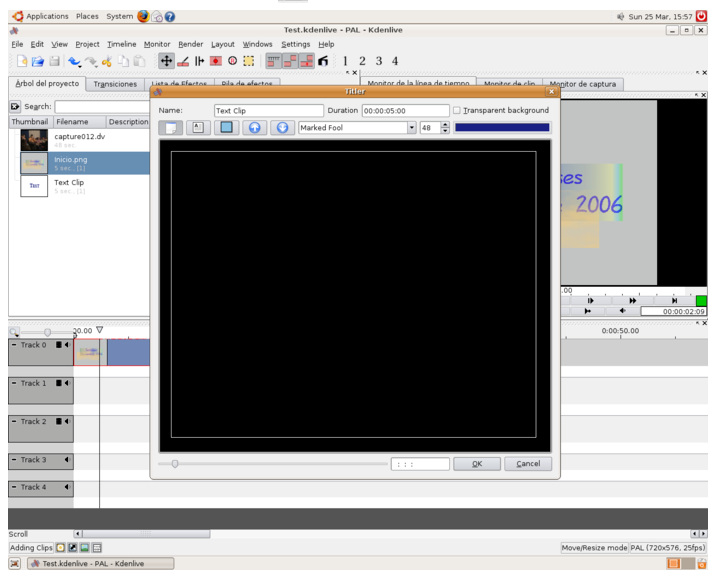
The next facility is that we can create a Title for the project. For creating a Title to the project, click the add clip option. Then we can select the add title option in the drop-down menu.
Then it will give us a canvas to create the title. Draw a rectangle to add a title. For adding the rectangle, take the rectangle tool from the top menu, and click and drag in the canvas to draw the rectangle. Then we can type the text with the text tool. We can change the properties of the title. We can do colour management also on the canvas.
Then we have to save the title. For saving the title, use the save as an option in the top menu and show the destination folder, in which we wanted to save the project.
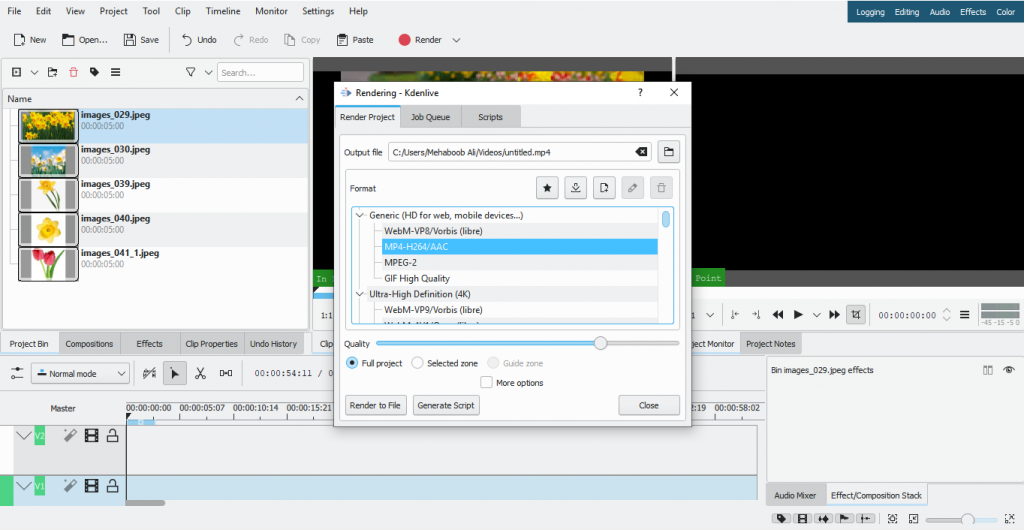
When allediting is finished, click the render button or go to Project ‣ Render(or press Ctrl + Enter).A remarkable feature of kdenlive is that instead of exporting the project, there is a rendering facility. We will get a dialog box as follows.

We can render the output file, in mp4 format, to the destination folder. If we render in mp3 format, and render, we can separate the sound of the video. It is a special feature of this video editor.
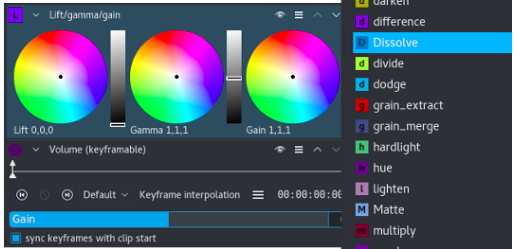
Thus we can create a one-hour video in kdenlive. So we can enjoy many other exciting features in kdenlive. Chroma key is one among them. Dozens of effects
are available, ranging from colour selection to audio adjustments. In total, constant practice in it will make us a good professional editor.