During the Covid-19 pandemic, the use of social media platforms has increased especially for the dissemination of information.
The list of social media tools when you search for one in Google is endless and could be quite overwhelming to you. You might be confused as to which tool to use.
The truth is that you don't need to try every single social media tool. You just need to skim the ones that value your time.
Choose the tool which saves you time, is easy to use, organize, and of course affordable.
Here I'm gonna discuss one such social Media Marketing tool - HootSuite. Is it free? Yes, it is, but with only the main features. A paid plan will get you access to many more features!
Hootsuite is a social media management platform that takes the form of a dashboard and supports social network integrations for Twitter, Facebook, Instagram, LinkedIn, Pinterest, and YouTube.
HootSuite offers 4 plans:
1: Professional
2: Team
3: Business
4: Enterprize
You can choose a plan accordingly to meet your needs.
Sign up here if you would like to acquaint it for yourself: https://hootsuite.com/billing/create-account?plan=PROFESSIONAL_PLAN
Hit the ‘Get Started’ Button once you sign up.
You will be prompted to connect to your social accounts upon initial setup. Click ‘Add Social Network’ and then select the network. Here we will first add a Facebook account.
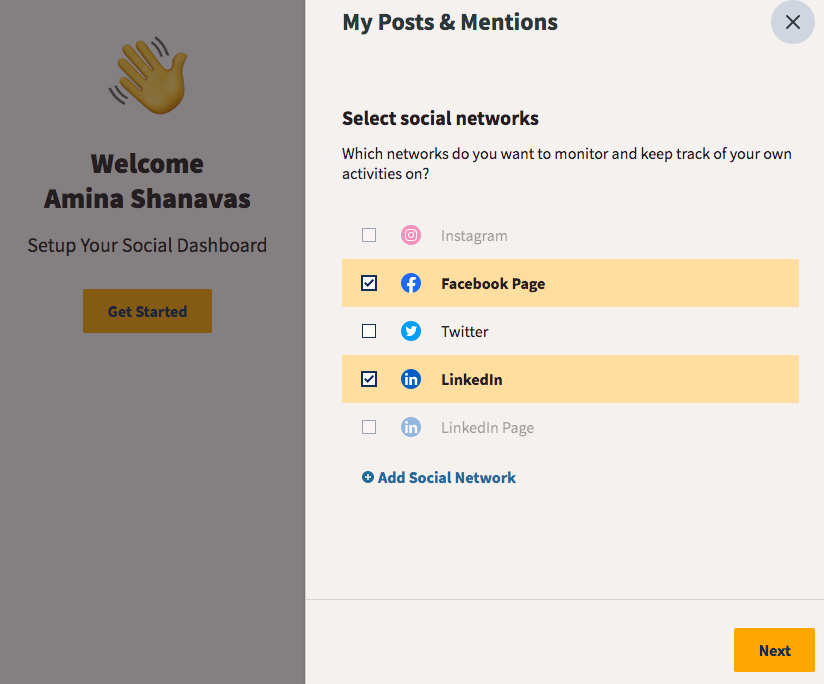
You need to authorize Hootsuite to access your account to be able to get all the functionalities it offers. Once it is done you have to select the page and then hit Add To Dashboard. Let's add a LinkedIn account similarly.
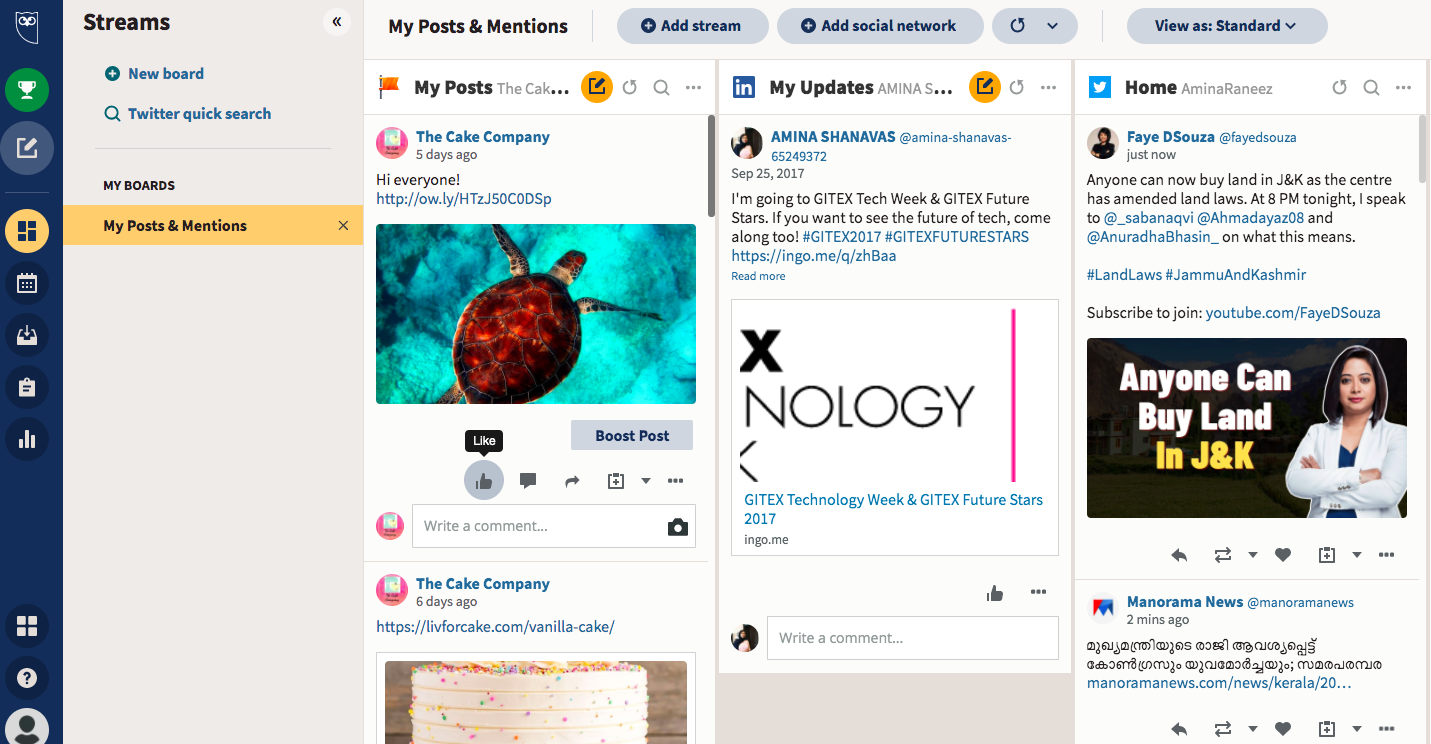
HootSuite will auto-populate a feed that shows your recently published posts and mentions from the accounts you added.
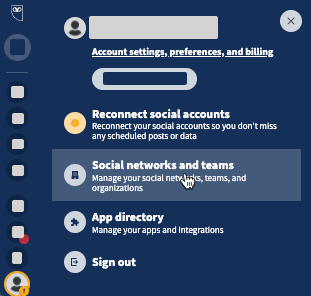
Now, anytime you want to connect additional accounts, you can go over to the My Profile button at the left bottom of your page and then click Social Networks and Teams button.
To add another network, Click Private Network and select the network you would like to add. Let's add a Twitter account here.
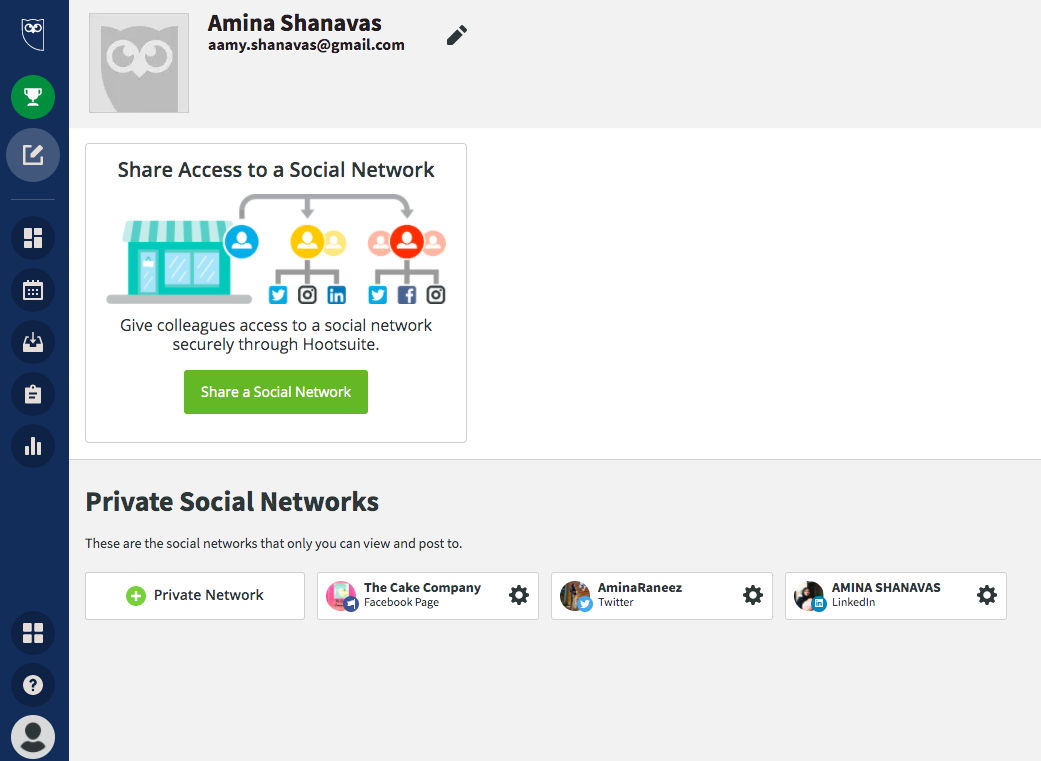
To get back to the dashboard, click on the streams button in the navigation toolbar. You can also add additional networks by going to The Streams tab by clicking Add Social Network.
Now let's see how to monitor and engage with the accounts we added.
Hootsuite Streams are just like feeds in our Facebook and Twitter which display the content from our connected social accounts and allow us to engage in conversations, follow specific keywords, and so on.
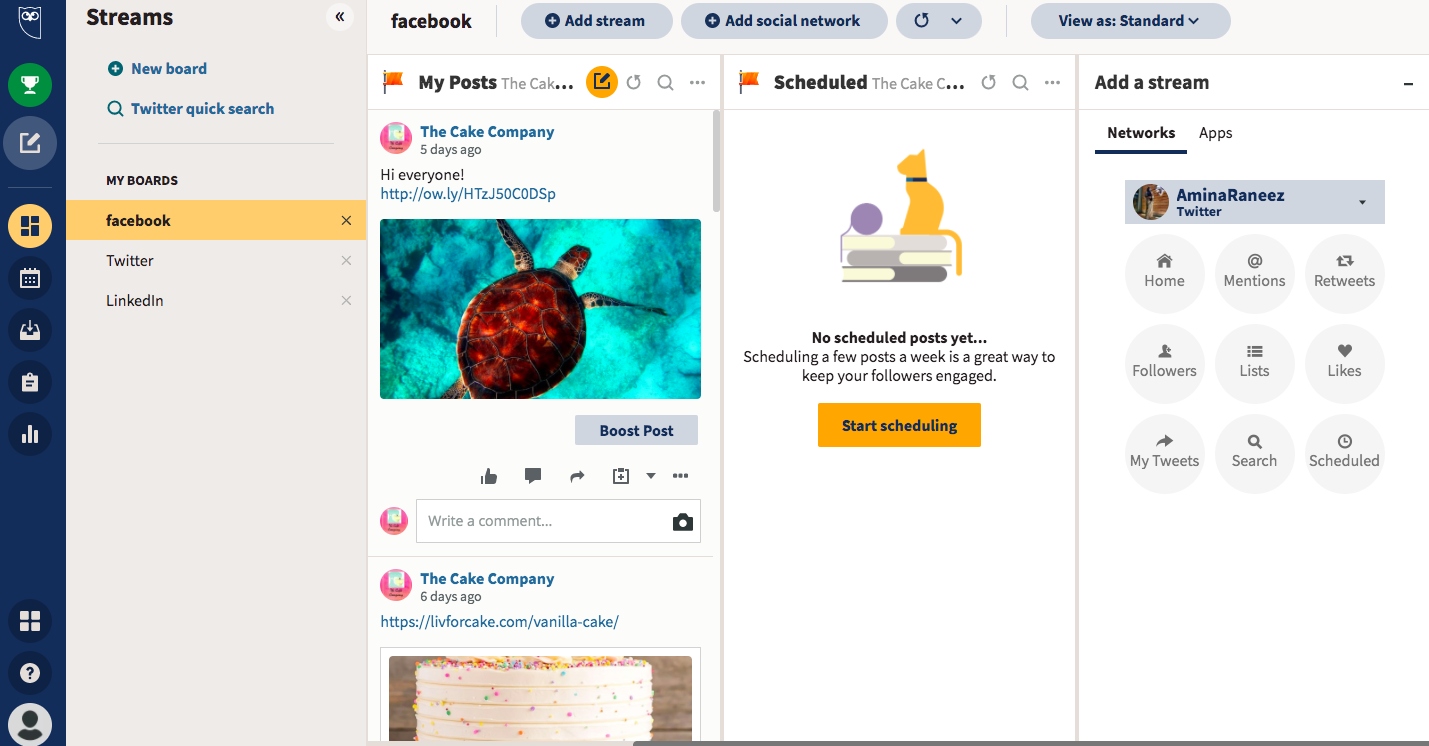
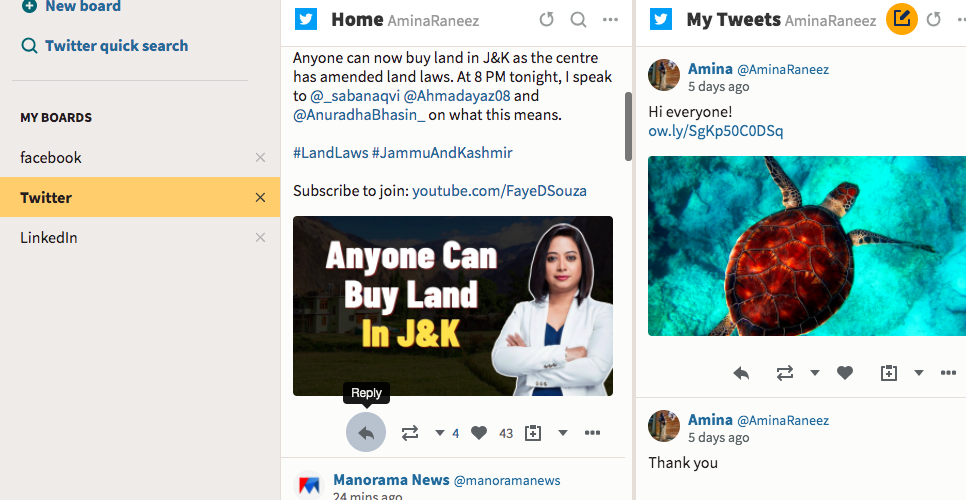
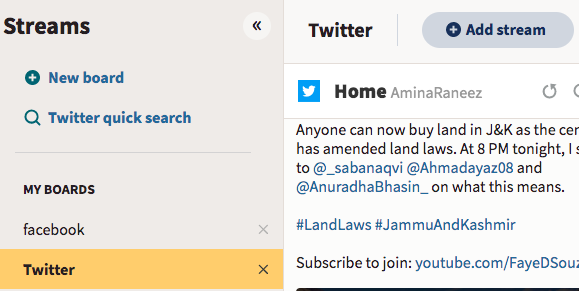
Now Boards are used to categorize and organize the Streams.
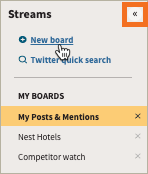
We can set up our boards and streams however we like. But here, I'm gonna rename the board to our Social channel so it's easy to categorize and manage the streams.
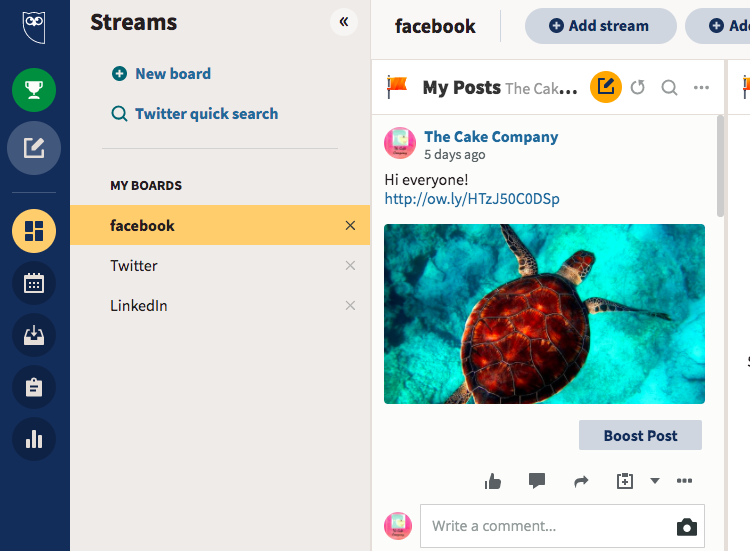
Let's rename the board to Facebook and customize the streams.
We're gonna create separate boards for each channel. So let's create a board for Twitter and Linkedin the same way we created for Facebook.
Now let's add Streams to the Twitter Board.
Here My tweets Show all tweets coming out of my Twitter account.
The Mentions stream let me see every time I've been mentioned.
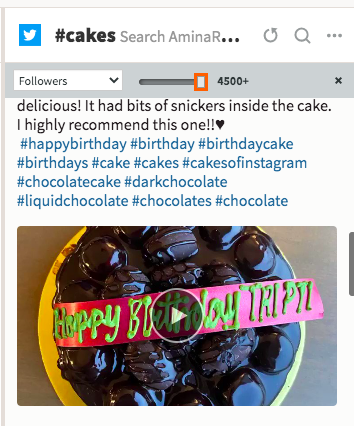
We can search for keywords, we like to follow like for example #cakes. Now that's gonna show me every time #cakes have been mentioned across Twitter.
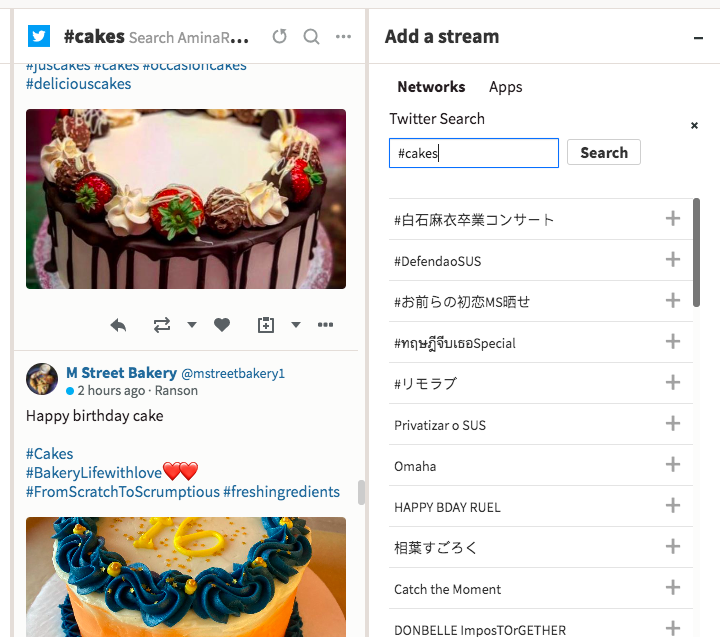
Another feature here is, we can filter the content by the no: of followers or a keyword
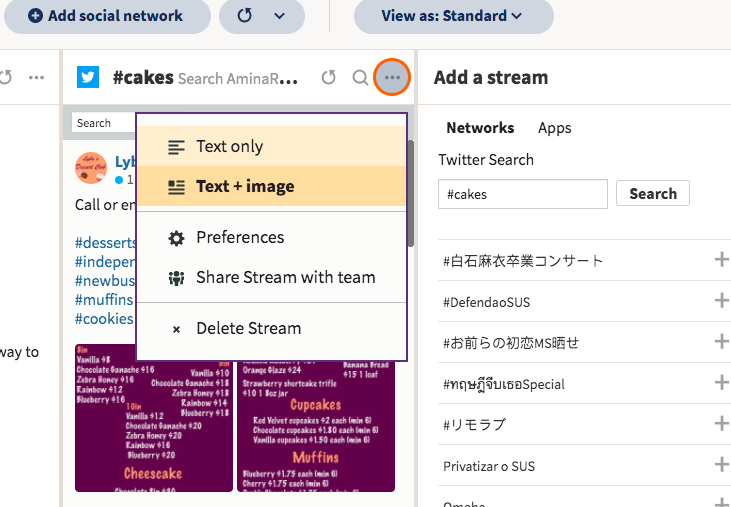
If we click on the 3 dots we can choose to see content with only text or text+image, we could also share this stream with our team and there is an option to delete as well.
As you can see, we can directly engage with our audience by hitting reply, like, retweet, etc. You can even assign a team member to take necessary actions on a particular post.
Any time you are in Streams, you can select Add Stream to create a new stream.
Create a number of streams and scroll through them to see what works best for you. You can easily create and delete streams, so don't be afraid to explore.
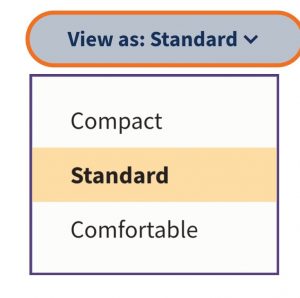
We can change the type of view to Compact, Standard, or Comfortable as your wish. Explore the views and select the one that best fits your needs.
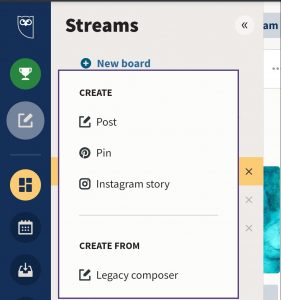
Okay, now we have all our monitoring and engagements setup. Now let's see how to compose a new message and post it.
You can create, schedule, and publish your social media content to Facebook, Twitter, LinkedIn, and Instagram from one place. For this, go to the Pencil icon in the navigational toolbar and click Create.
The New Post window will pop up. Select the accounts, you can check the box beside the network you would like to post the content to.
The Message Compose Box will pop up next.
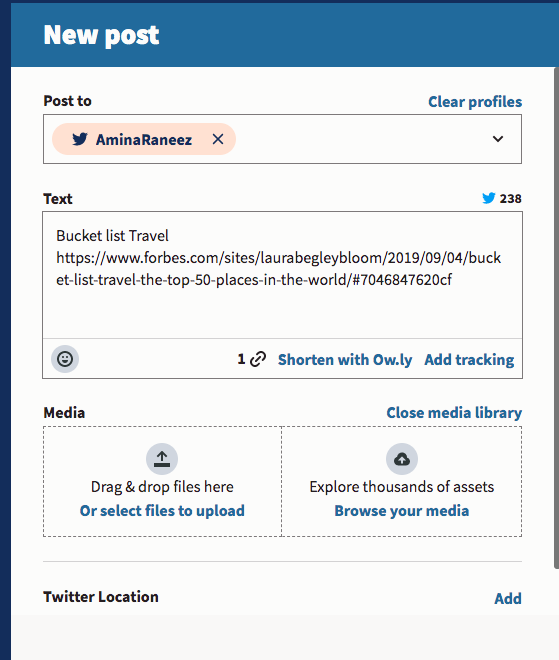
Enter your content, you can add emojis, Mentions, or tags for a user or page, Links, Images, videos, and GIFs.
Let's add a link to ‘Bucket List Travel’ here. The URL here is too long, so we’ll Click Shorten it with Ow.ly. As you craft your post, you can review it using the preview next to it.
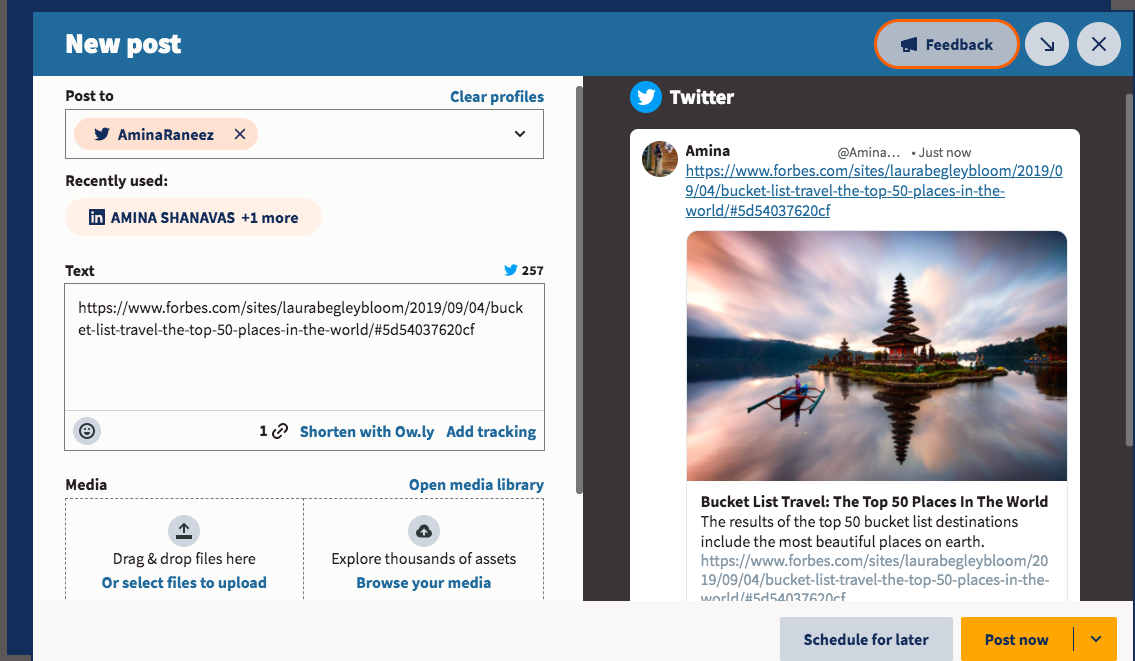
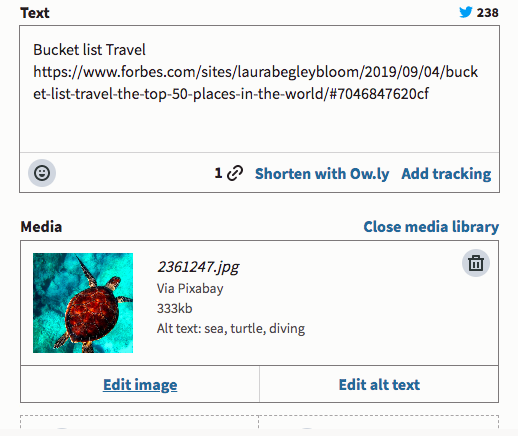
We can upload an image or video from our computer, or browse the media library from HootSuite if you don't want to use the picture shown in the preview.
Let's do that by selecting an image from the library. As you can see, you get an option to edit the image here itself which is a cool feature.
You can set your location and also target the audience by Age and location(only for Facebook).
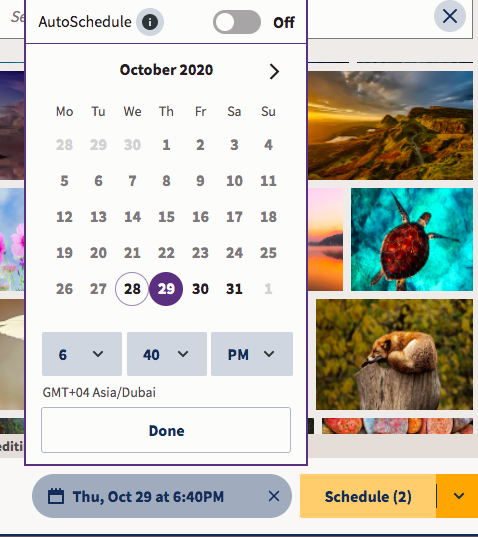
Pick a date and time to publish the post so we don't have to worry about it.
There is an option for AutoSchedule at the top. We can choose to turn it On if we would like Hootsuite to choose an optimal time to post.
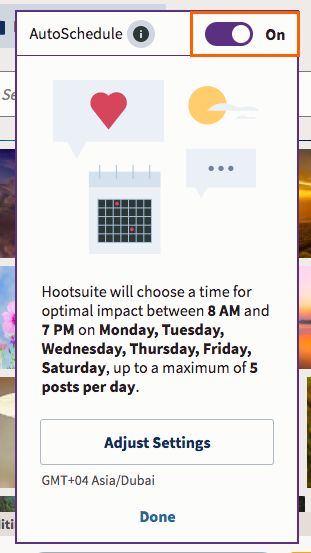
We can also adjust the AutoSchedule Settings where we can select the frequency of messages and also Select the days you want your messages to be scheduled on.
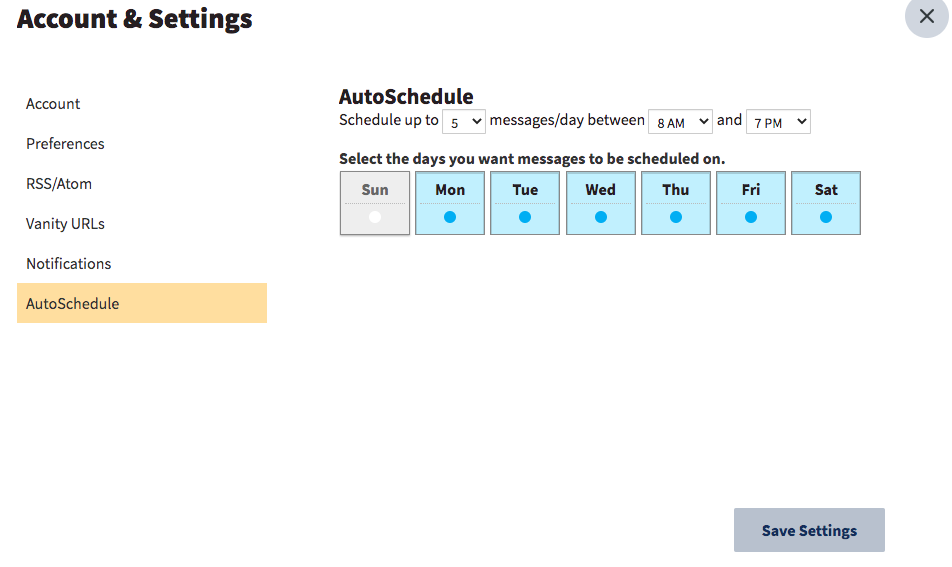
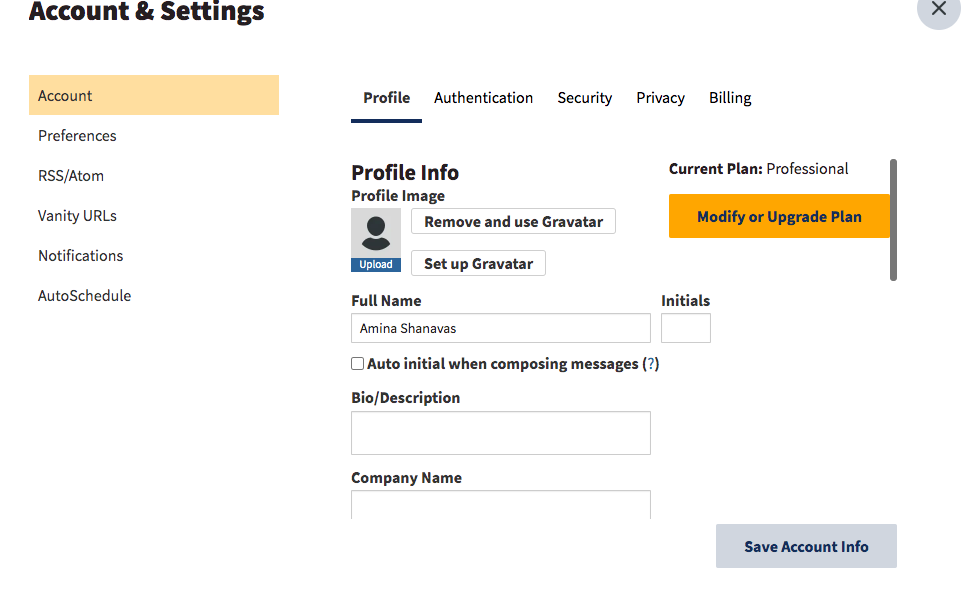
As you can see this is the Account and settings window, if we click Account, we see options to upload a profile picture and give bio/description.
One important thing to note here is the Time Zone.
We have to make sure that the time zone we are working in is set right here.
Let's just turn off AutoSschedule for now and set a time and click schedule.
Now that the post is scheduled we can review or edit it before it's published, or delete it anytime.
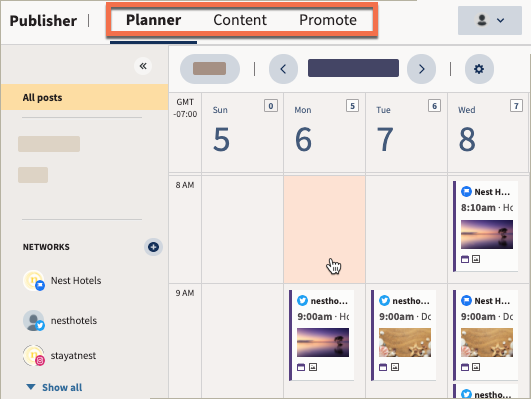
To view your scheduled content, hit the Publisher button in the navigational toolbar. Here you see all the accounts you have linked and the scheduled content. In addition to viewing your scheduled content here, you can also create new posts and organize, edit, or delete existing ones right from the calendar. If we click on the calendar icon seen below, you will be able to edit this post, also you can delete or move to drafts. YOu can also change the date and time by simply dragging.
The following views are available:
Let's take a quick look at the rest of the options in the Toolbar, though we’re not gonna discuss it in detail.
Inbox: Hootsuite Inbox, helps you engage with your audience and customers in one place like replying to messages, mentions, etc.
Assignments: Let you collaborate with teams and organizations. YOu can assign posts or comments to team members and manage content with tags.
Analytics: You can use Analytics to measure the overall performance of your social media activity across multiple social networks.
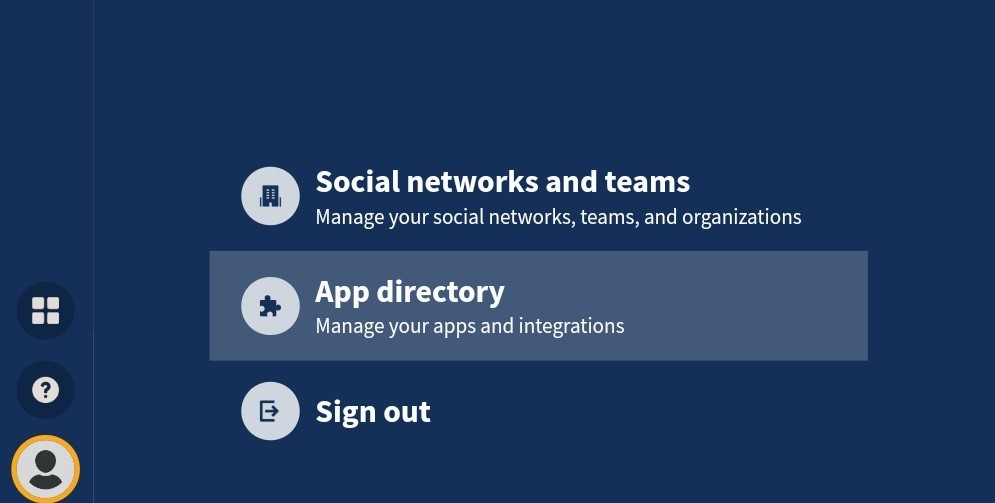
The last thing we are gonna look at is the App Directory. Click My profile and then App Directory. There are many Apps which we can integrate with HootSuite available here. Let's select Canva here, it's a free App that allows you to create content directly from your Hootsuite dashboard.
So that's all on how we can set up a HootSuite dashboard, create, publish, schedule content, and engage with your audience.
Watch the tutorial video below :