Have you heard about Kinemaster? Kinemaster is a great app for video editing and it's free! Even a person with no prior video editing experience can easily edit videos like a professional video editor.
Features of this Kinemaster tool are its awesome assets.
We can download incredible effects, music, stickers, fonts, and much more from the Kinemaster Asset Store. The second one is to get the projects.
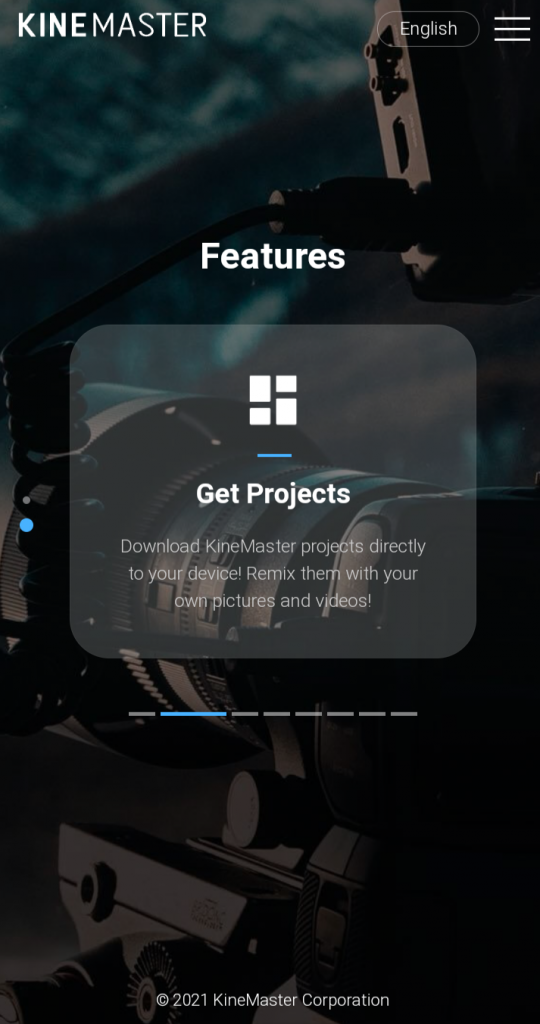
We can download the Kinemaster projects directly to our device, remix them with our pictures and videos. The third one is back up and share.
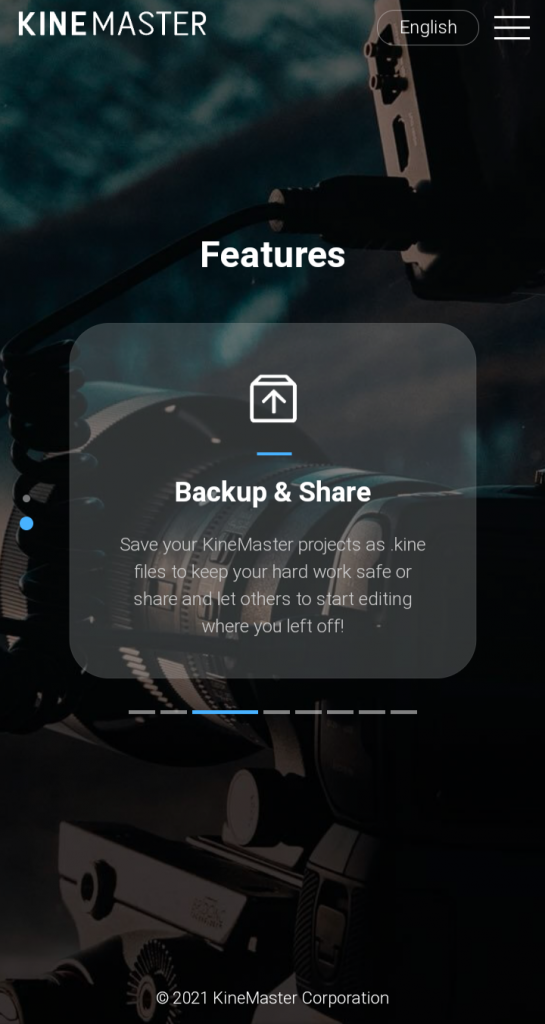
We can save our Kinemaster project as kine Files for safeguarding your hard work and also share with others and others can start editing where we let off! The next is the blending option.
![]()
It allows videos and images to be overlaid, creating magical Artistic effects. The next option is the Reverse option.
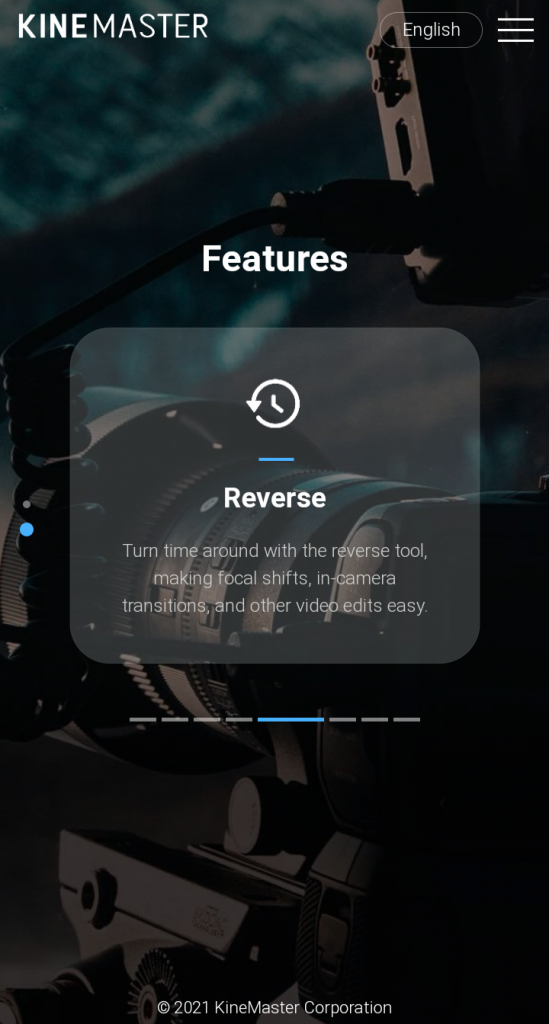
Turning the time around with the reverse tool makes focal shift in-camera transition and video editing easy. Next is the Chrome key.
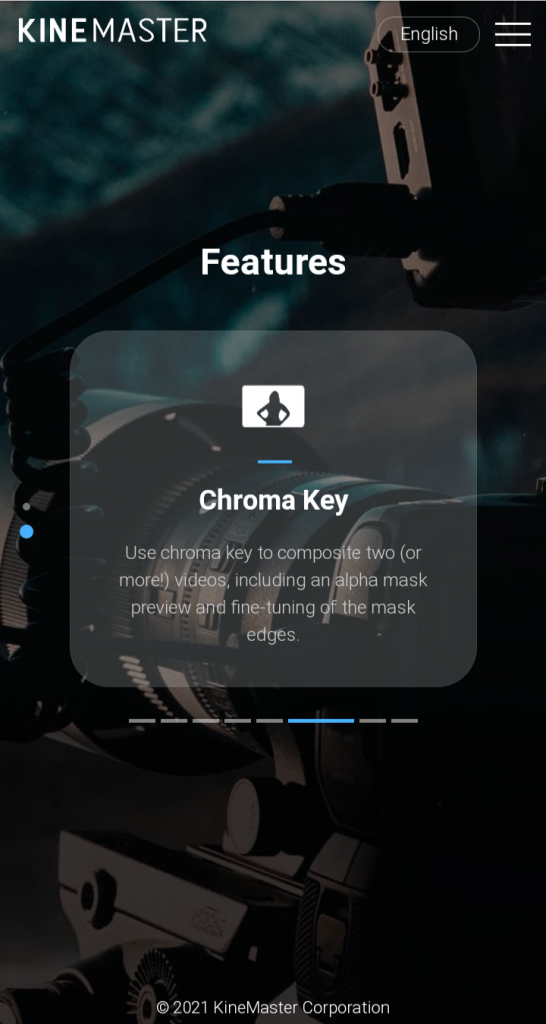
It is to composite two or more videos including Alpha mask preview and find turning off the mask edges. The next option is high resolution.
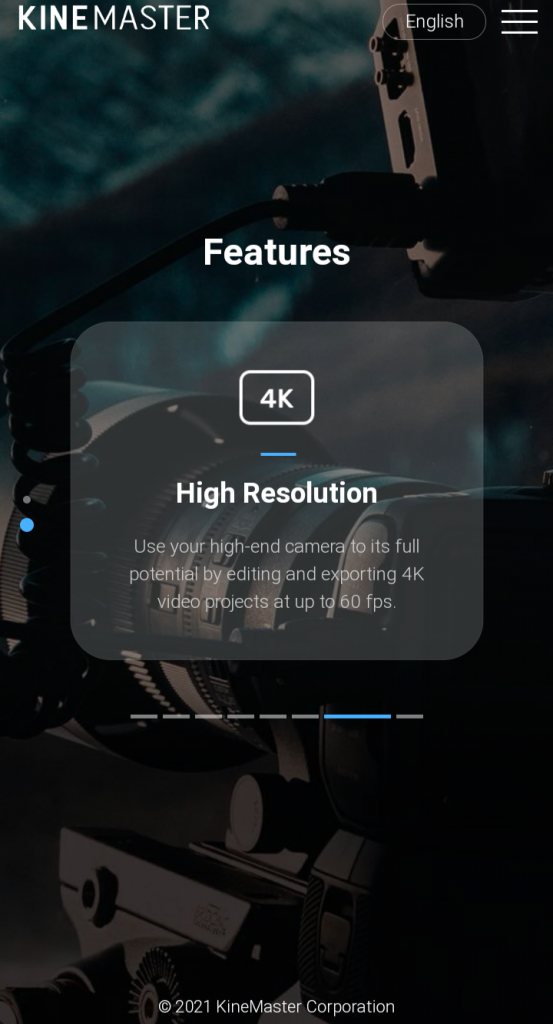
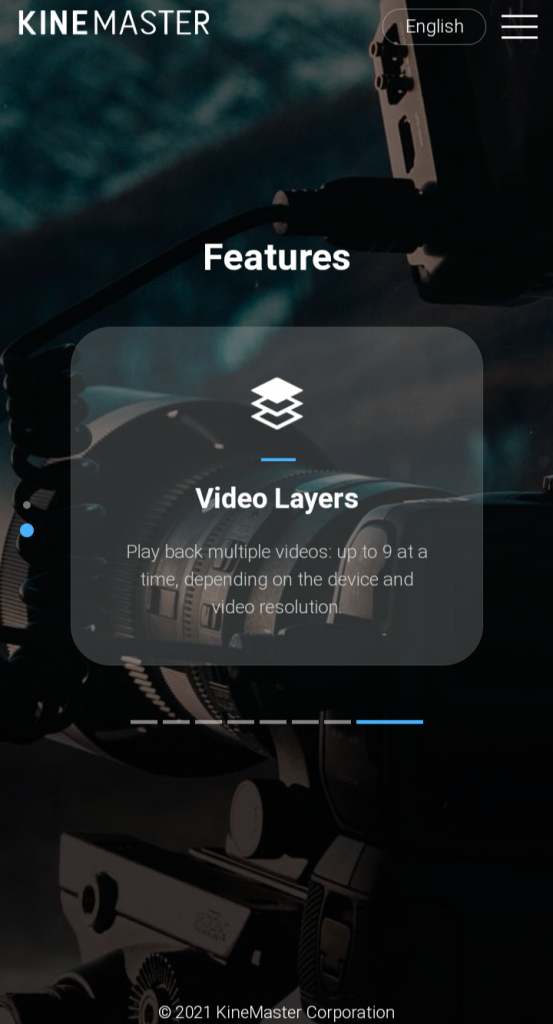
Use your high megapixel camera to its full potential by editing and exporting 4K video projects at up to 60 FPS. The next is the video layer.
Playback multiple videos up to 9 at a time depending on the device and video resolutions. This tool can be downloaded from the Google play store. First, we have to click on create new that appears on the interface of the Kinemaster.
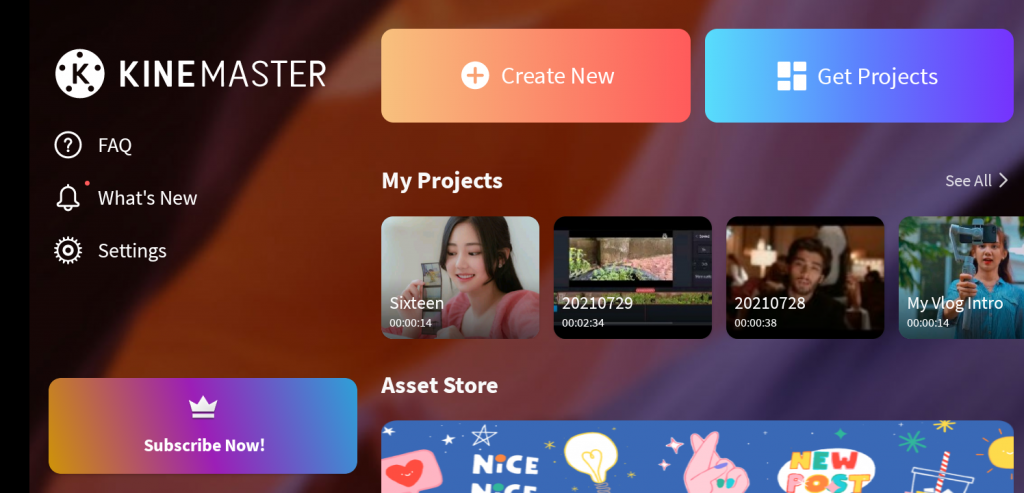
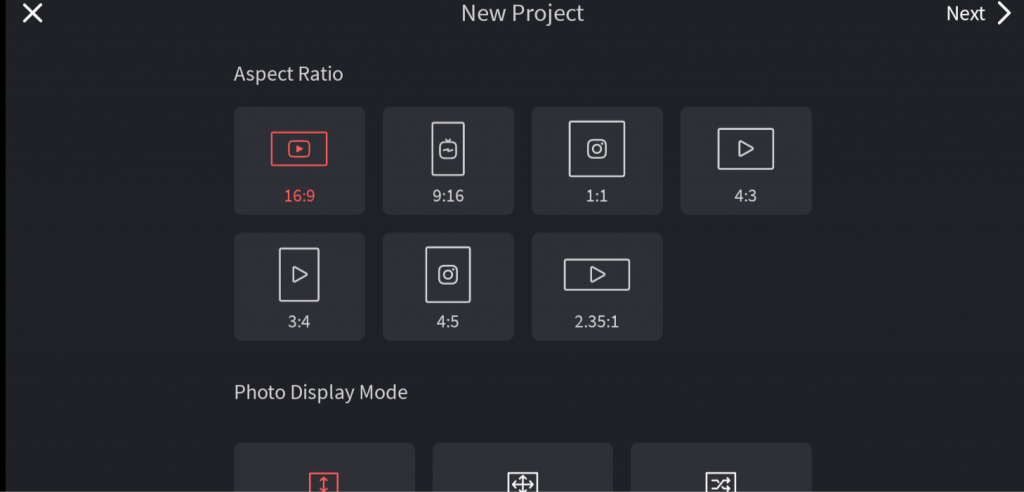
Click next. Then we land on the Media Browser. We can choose the video we want to edit.
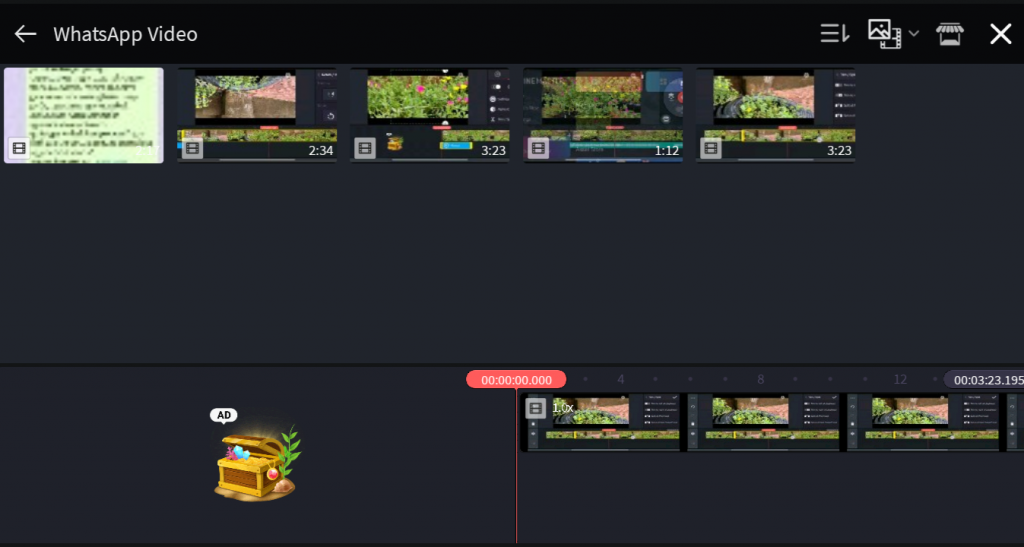
First, we can see the media option.
From the media, we can upload the images or extra videos along with this video.
The second option is Layer, which has so many sub-options.
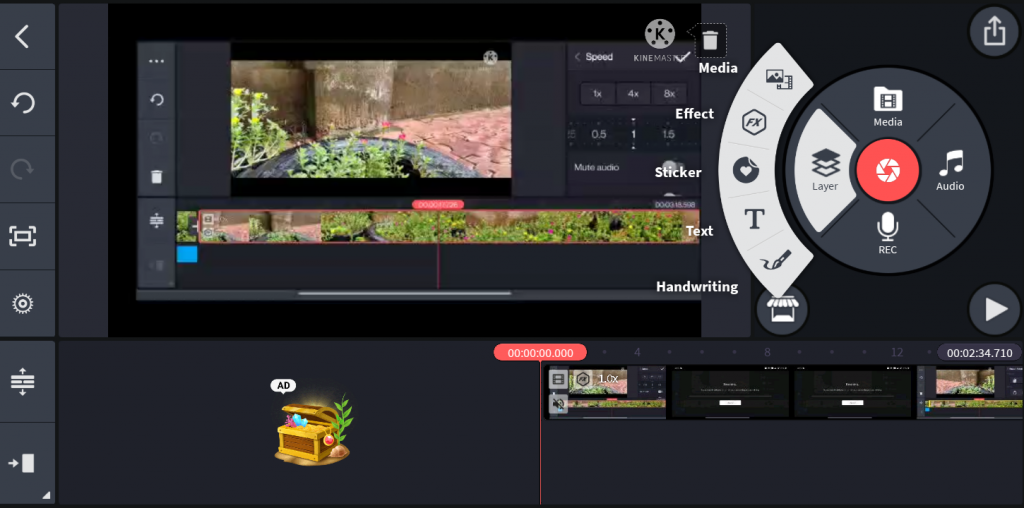
First among them is the media option that we discussed above. The next option is the effect.
Click on the image and click on ✔️ on the top right.

Then click on the options among them. The first one is ‘In animation’.
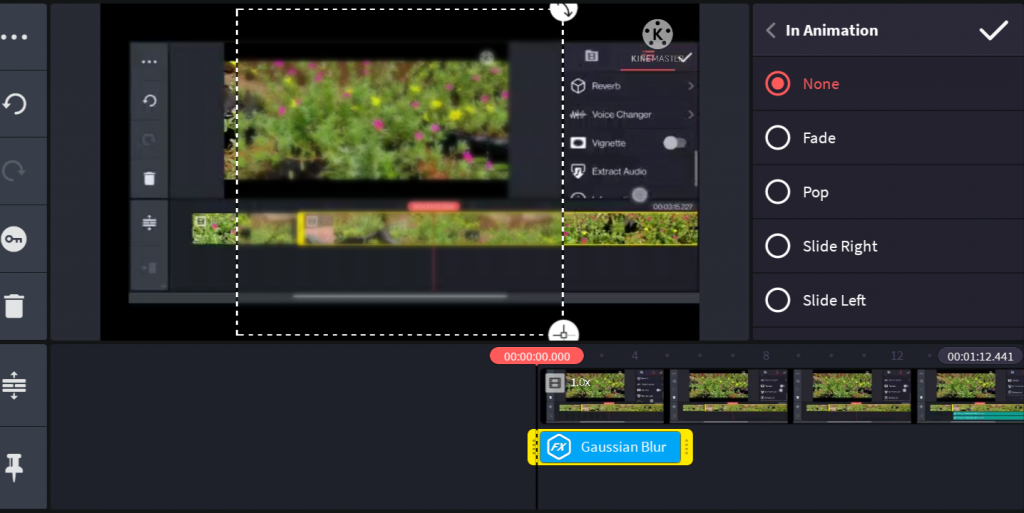
Fade, Pop are some of them. The next one is ‘overall animation’. It has a jitter, fountain, etc. Next is ‘out animation’. They are slide right, slide left, etc.

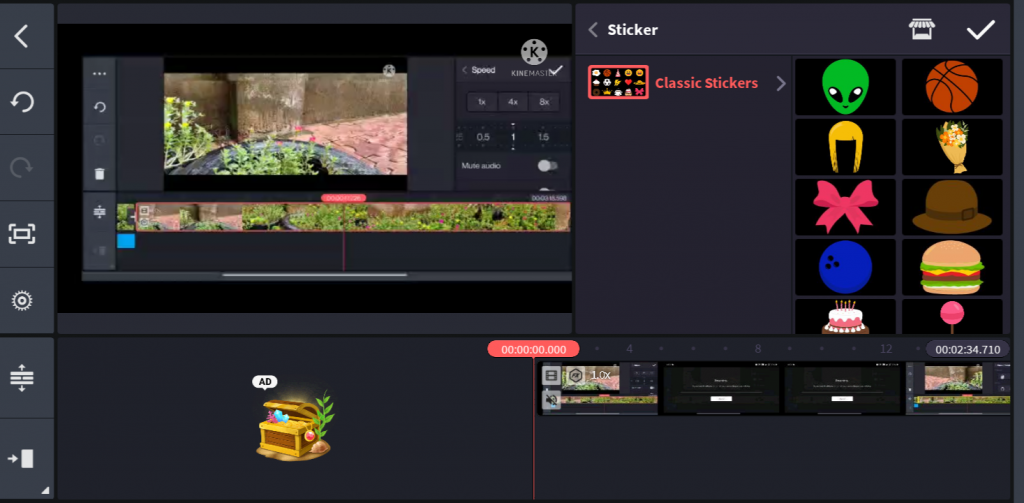
The next option is Sticker. There are so many classic stickers.
The next option is text.
We can add the text we want to upload to the video.

Next is to help us to write with our own hands.

Next is the record option.
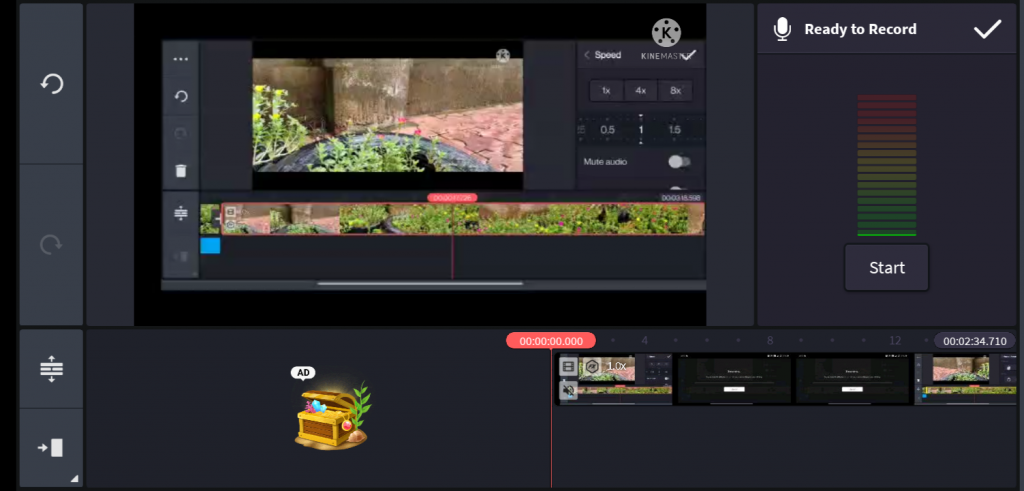
To record the audio on the spot.
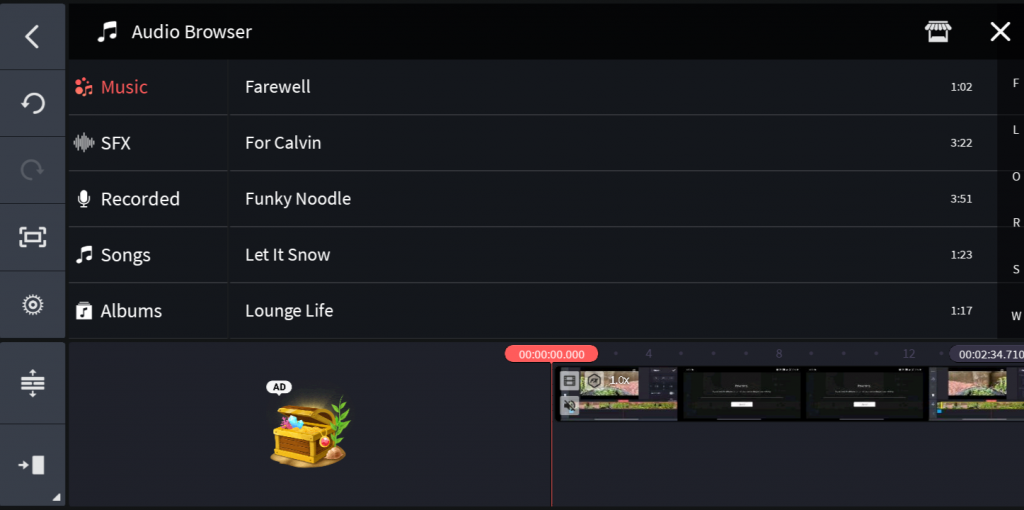
Next is the audio option.

We can see music, SFX, songs, albums, artists, and genres in the audio Browser. We can select our favourite song from it.
Click on the Asset Store.
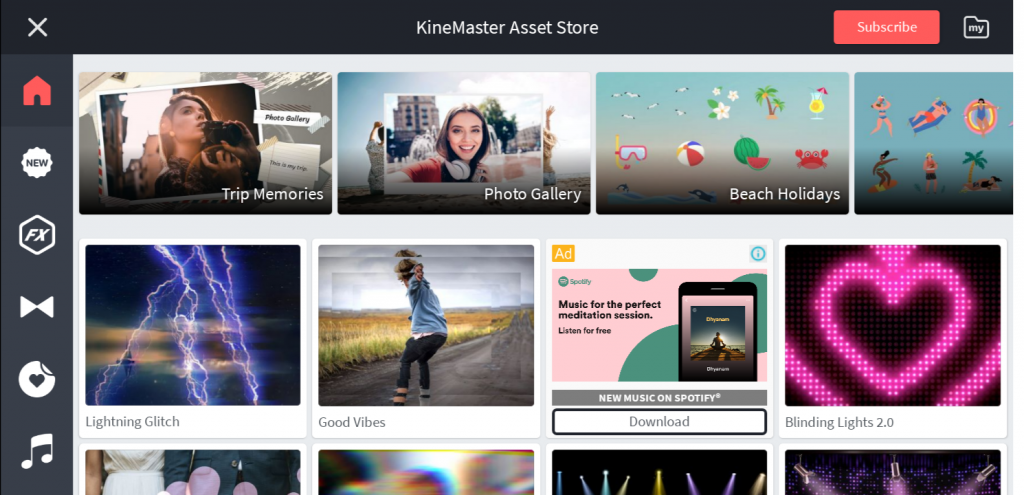
We can download assets for use in the projects. There are 5 categories: effects, transitions, stickers, font, audio.
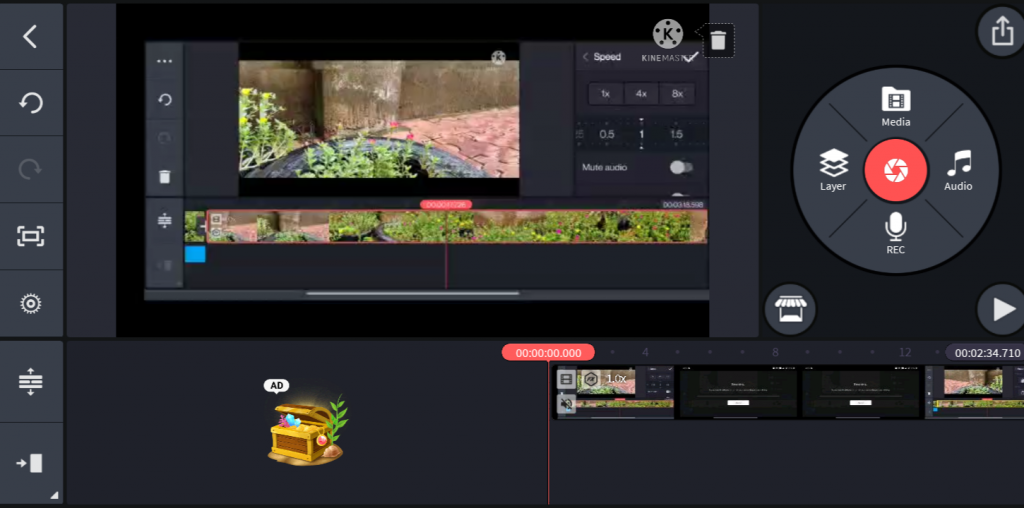
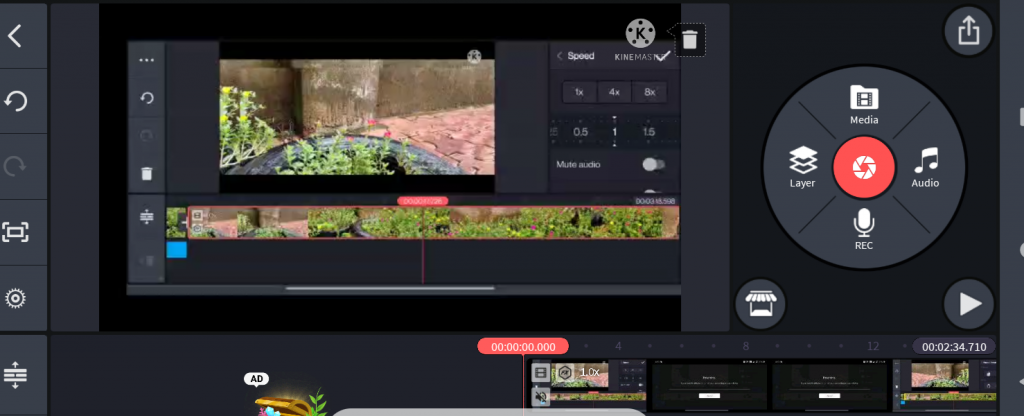
Then click on the video and we can see a yellow shade around it.
It means the video has been selected. Along with it, a box with many options will appear. The first option is trim. It is in the shape of scissors. When we click on the scissors we can see an additional option on the spot.

Among them, the first one is trim to the left. It means cutting the unnecessary portion from the left side. Likewise, trim to the right. Beyond that, there is an option. When we click it, it is split into two parts. In between that, we can add images, or else we can delete unwanted portions. The next option is slip. The next option is pan and zoom. Peculiarities of this option are zooming at the start portion or end portion. Next is the volume option.
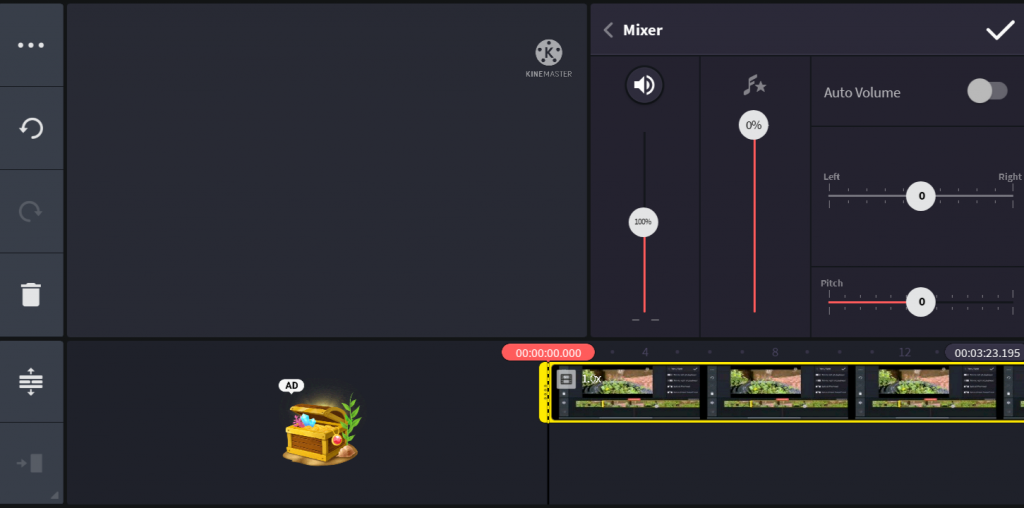
Where we can adjust the sound from left to right or right to left. Next is clip graphics. Travel, activity, powerful are a few of them.
Next is the speed option.
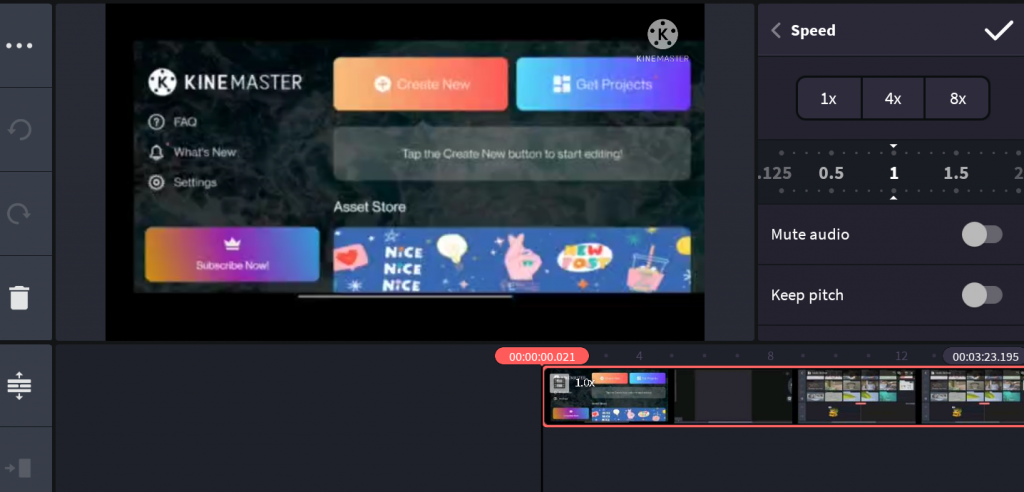
We can increase or decrease the speed of the video. Also, we have the option to play the video in reverse.
It takes a lot of time, that is why I didn't show it to you. Next is the rotate option. Next, we can also use colored filters.
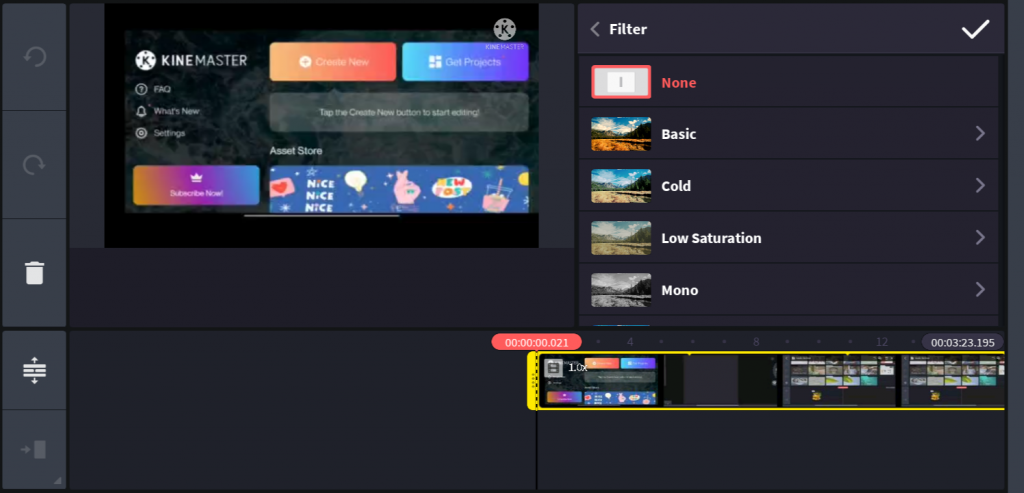
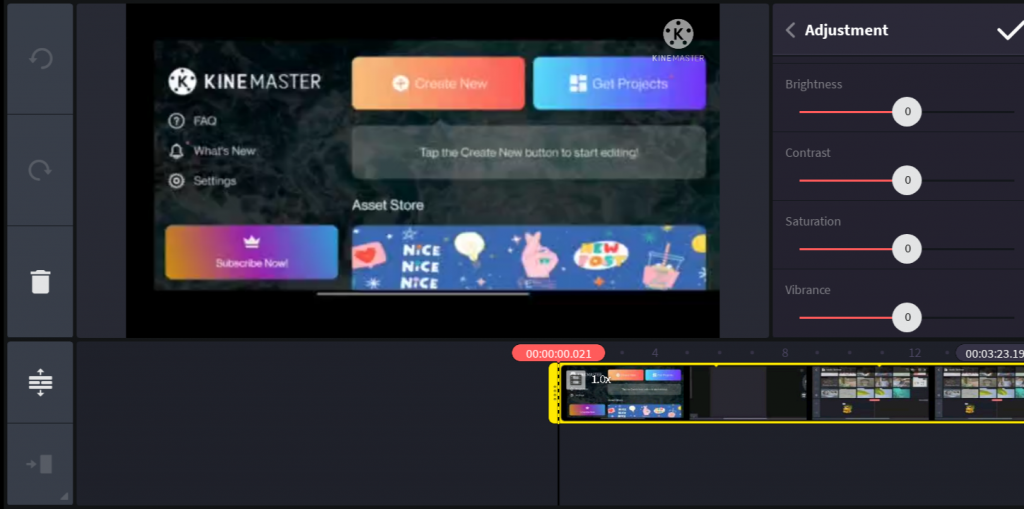
There is an option named adjustment. There are many adjustments we can make to increase or decrease the brightness, contrast, shadow e.t.c. next is the EQ option AMradio and Hip Hop are some of them.
When we click the next vignette option, we can see a black frame surrounding the video.
The next option is to extract video.
And
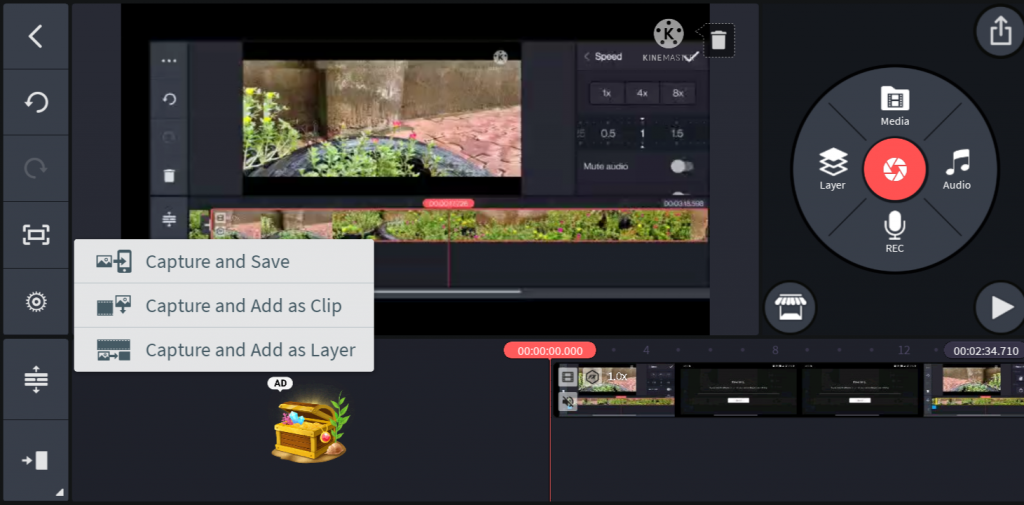
On the left side, we have the option to capture and save, capture and add as a clip, capture and add as a layer. The next project setting. The next option is to reach the last portion of the video.
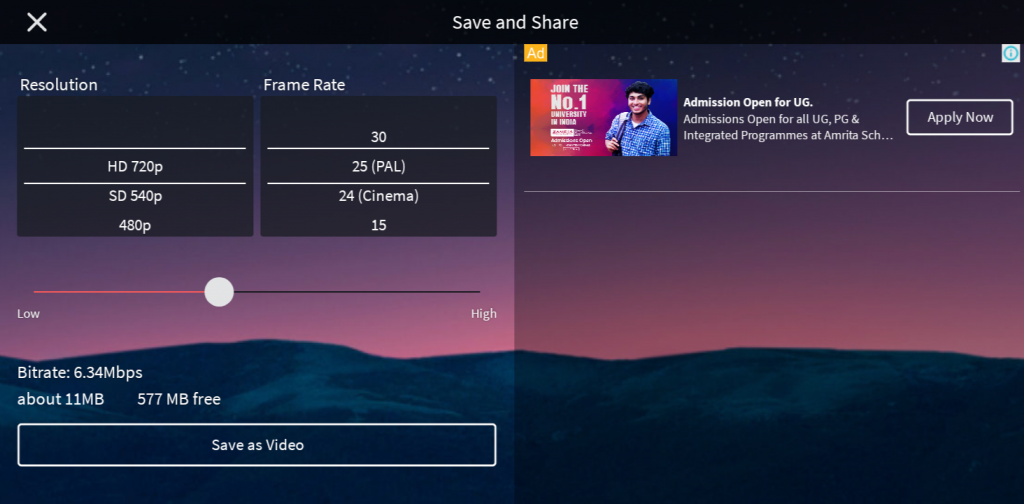
Now we have finished our video editing. we have to download it by clicking on the arrow option at the top right.
We have the option for adjusting resolutions also and save the video.
FAQ'S
Kinemaster may be a mobile video editor for Android and iOS devices. Kinemaster's goal is to bring professional-quality video editing features. Kinemaster supplies a huge array of video modifying functions, consisting of shift results, text and handwriting overlays, video and image layers, the maximum amount of four extra audio tracks, in-depth volume envelope control, and more. This premium video editor helps smart device users to experience the performance of the video editors that are generally only available for PCs.
The watermark is obtained instantly once you register for Kinemaster. Membership is often purchased once you share a task, or beforehand from the about my account screen in settings. On the Kinemaster 4.1 version for Android, there is an alternative method to eliminate the watermark by simply using music from muserk in your project.
Edited tasks are instantly saved as you are editing, and that they won't be deleted when a replacement task is developed.
4. Which gadget and OS version are currently supported by Kinemaster?
Kinemaster is utilized with Android OS 4.1 or afterwards, nevertheless, it's more steady if the OS is 5.1 or later. Kinemaster works with iOS 10.0 or later, and on iOS gadgets with a 64- bit(A7 or afterwards) processor.
Yes. In basic, you’ll utilize any audio file from your device, consisting of music. To integrate the audio from your device, tap the music note icon while editing to feature an audio track from the gathering of music on your device.
Import Audio FormaMainMP3, M4A, AAC, WAV.Import Image Formats:
Export Video Format:
Kinemaster is a user-friendly tool that can be used to edit videos with quality and precision. Not just that, it has got many exciting features and multiple tools like precision trimming, cutting of audio, text, video, images, etc., and effects like we saw in this blog. Therefore by using Kinemaster you can easily create a professional-level video.