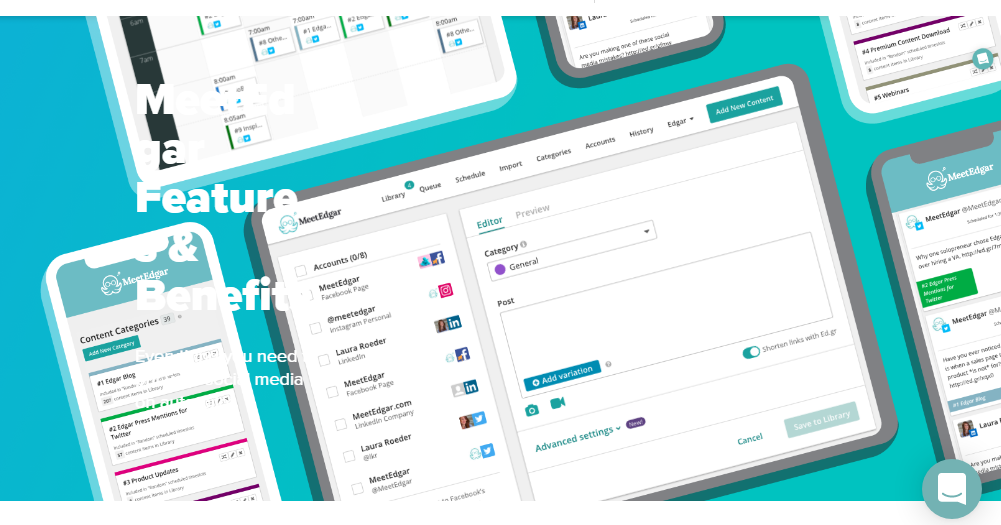
MeetEdgar is a social media tool for scheduling social media posts. The main reason to use MeetEdgar is it saves us a lot of time. And MeetEdgar has a calendar option and we can pick and choose when we want certain categories to be shared. What makes MeetEdgar special is that when you put content into MeetEdgar you can make it so that it circulates sort of forever.
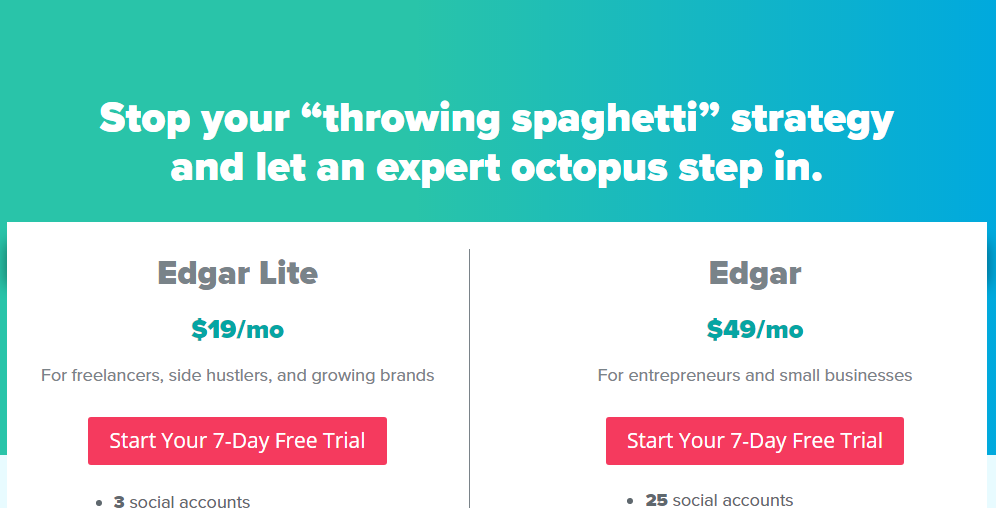
MeetEdgar used to have one pricing plan of $49 a month. And they added now a more accessible plan of $19. Free 7 days trial also here.
Upon sign up, you’re offered a free trial for 7 day. Regardless, you can not start without giving your credit card details up front.
When you sign up for MeetEdgar, the onboarding process is a little straightforward. After going through four very simple steps. If you do not finish the steps, the dashboard will remind you until you do. This process is quite appreciable, it sets you up for success with the tools instead of leaving you on your own. There are so many other scheduling tools that show you the steps you need to take for getting set up, but MeetEdgar does it in a way that would not let you go ahead without it.
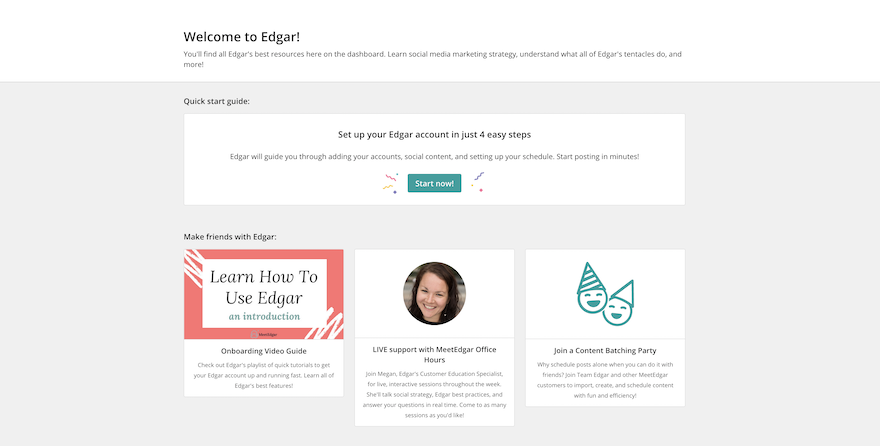
These are the onboarding steps:
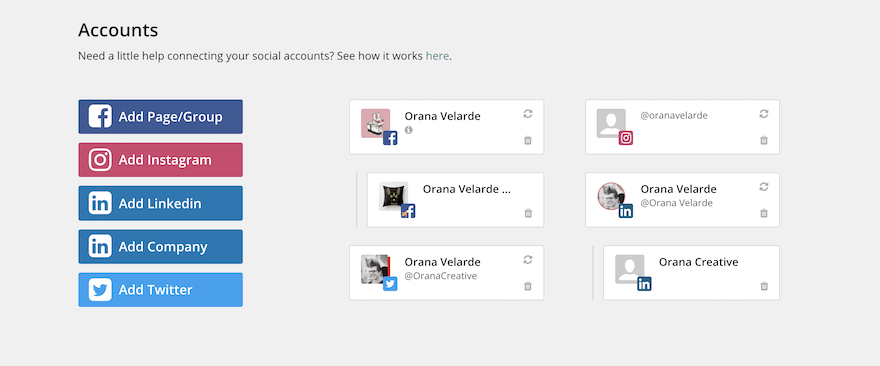
Social channels are organized as follows:
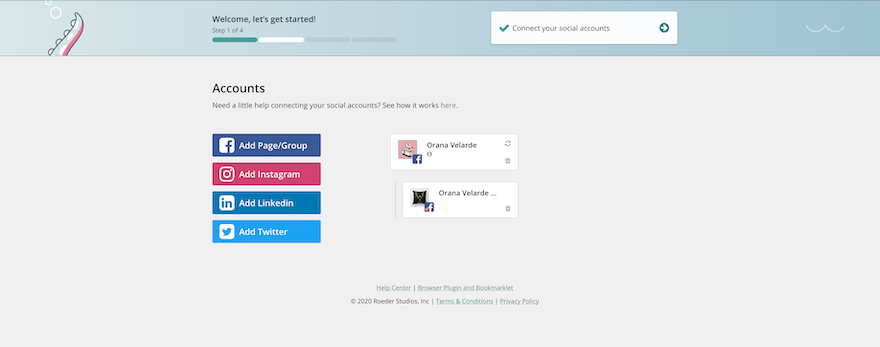
You don’t need to add all your accounts as you’re setting up. And also you can add more later or when you upgrade to the $49 a month plan.
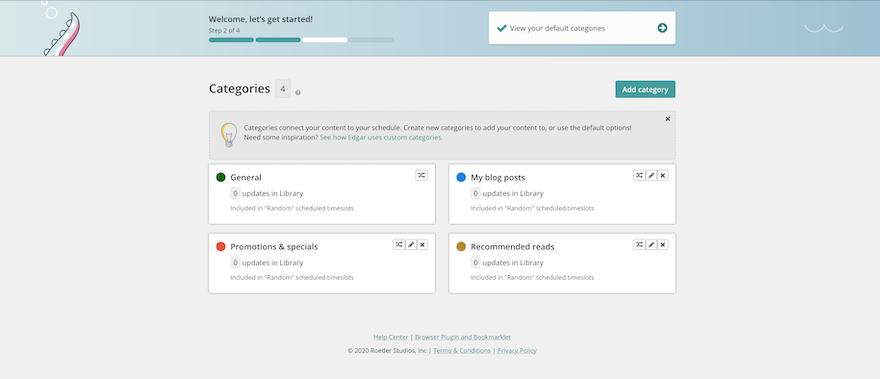
Every content added to your MeetEdgar library must be put into a category. And you are offered four to start with:
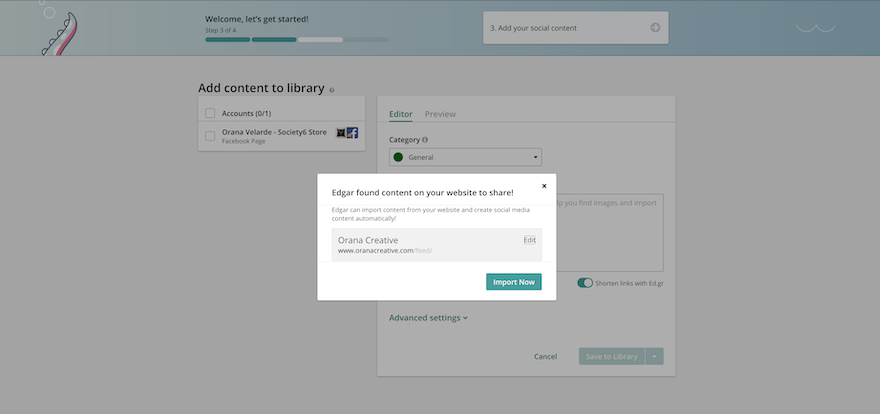
The next step is adding content. If we signed up with an email associated with your website, MeetEdgar will instantly pull the RSS feed for you. It will offer to import the content into your library. This is a very simple way to get started with content in MeetEdgar. If we added a Gmail email, for example, there will be no content to import.
It is important to note that Facebook would not add these variations automatically, they will only be suggestions. Then you have to copy and paste the text into the correct window. In the case of Twitter and Linkedin, the content will be added to the editor window automatically.
Additionally, you can add manual variations for any of the content. What you can not do is personalize the content for each social media channel.
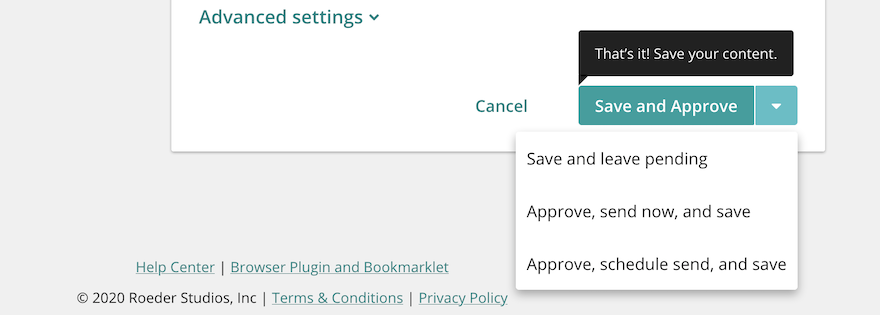
When your content is ready, it is time to save or schedule it. The content editor shows you three options:
Every content will be stored in your library, either pending or approved. The first option is to simply save it in your library to schedule later. The next choice will share the content one minute after clicking the button and then be added to the recurring queue for its specific category and social media accounts. When choosing the 3rd option, you’ll be able to schedule the post for a specific time. After that, it will be added to your library and will go out again according to the category’s recurring schedule.
You can use the advanced settings to schedule content to go out only once or to expire at a certain time.
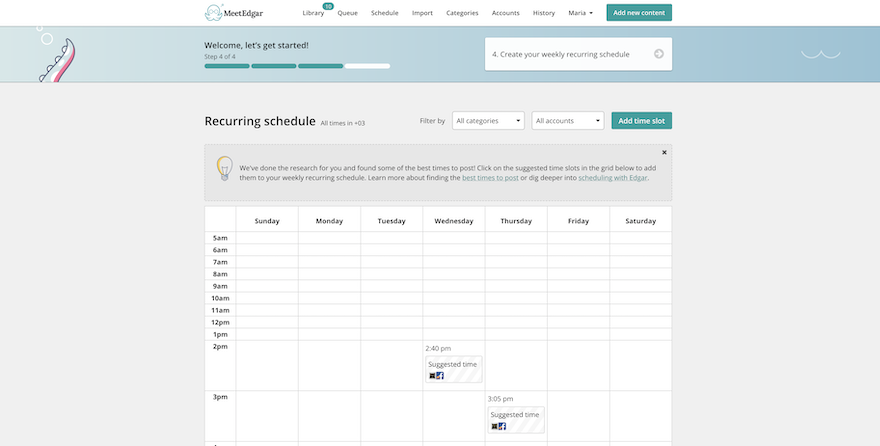
The last step is to create recurring schedules. These are the publishing queues that repeat once their allotted content running out. If you do not create these schedules, you’ll only be able to share and schedule our content manually. We can set up all your schedules or just a few and then do the rest later. Just we need to add at least one to finish the tutorial.
MeetEdgar offers suggested times to share on particular social accounts, you can choose to follow these suggestions or create your own schedules. The tutorial also offers other resources to find out more about the best posting times and how to optimize our MeetEdgar scheduling.
The scheduling tools in MeetEdgar are another of the well-known features that social media managers favorite.
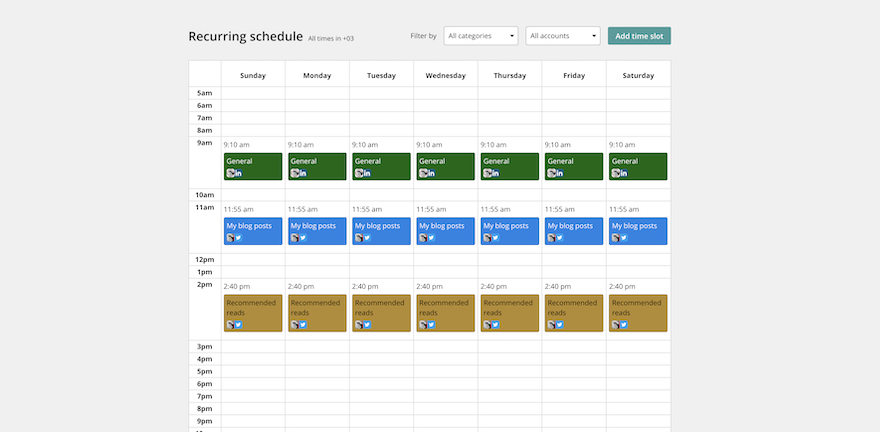
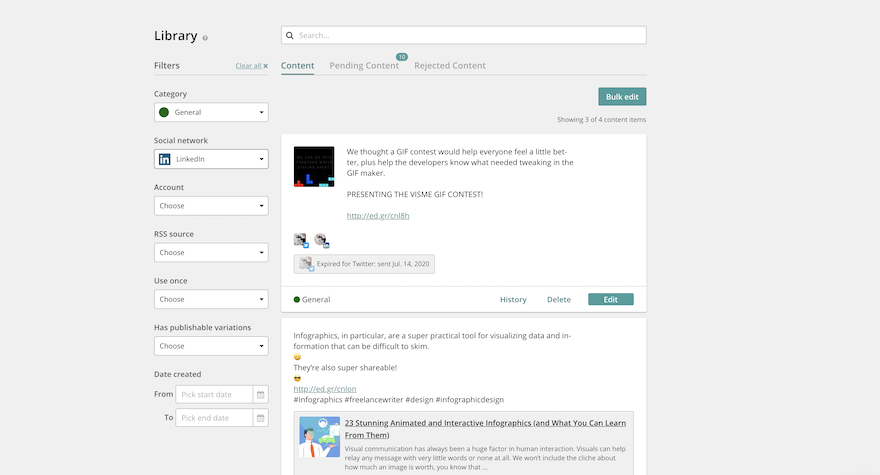
The recurring publishing queues pull content from the library. The library has three main sections:
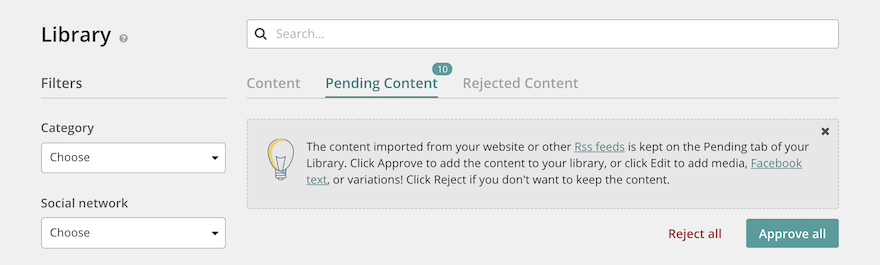
To view the content in your library, use the filters to find specific kinds of content. Each content phase has the option to edit, delete, or see it is posting history. These are to help you navigate the library:
You will be glad to have these filters once the library has a lot of content in it.
Another available option in the library is the ‘Bulk edit’ feature. This is very helpful when you need to edit something particular on all the posts for a specific campaign. MeedEdgar sometimes reminds you about how bulk edit has no ‘undo’ button. Once you’ve changed something, that is it.
Use the filters intentionally before doing any bulk edits.
To reap the benefits of the Meet Edgar library and recurring schedules, you will need to add plenty of content to the library first. There are only three ways to add new content to your library:
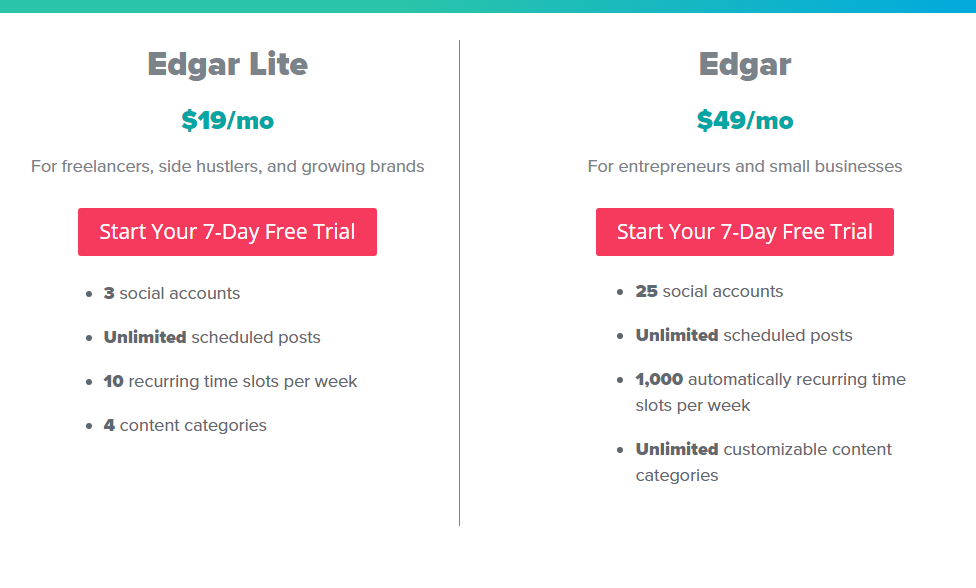
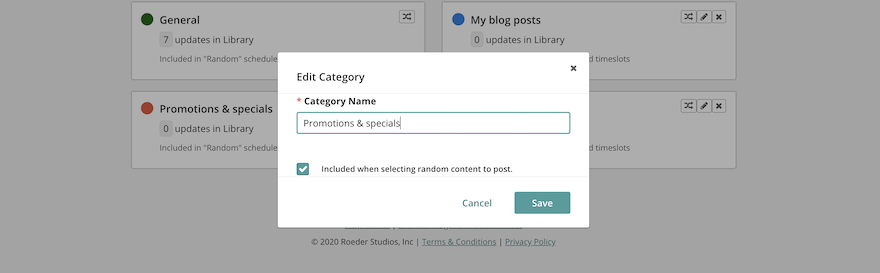
Well sorted categories are a large part of your success with MeetEdgar. The $19 plan only offers 4 categories, meaning you will have limited control over the organization of your content library. The $49 plan offers unlimited categories. As I mentioned before, you can not add content to the posting library if it is not added to a particular category.
You can use categories for particular campaigns, types of content (video, blog post, carousel, etc), and anything that will help you keep your content sorted.
When you add a new category, there’s an option to add it to the “random scheduled time slots”. When you turn it off, the category is considered to be a ‘holding category’. All your content in this category will stay unshared until you either change the category for each of content or turn the above-mentioned toggle back on.
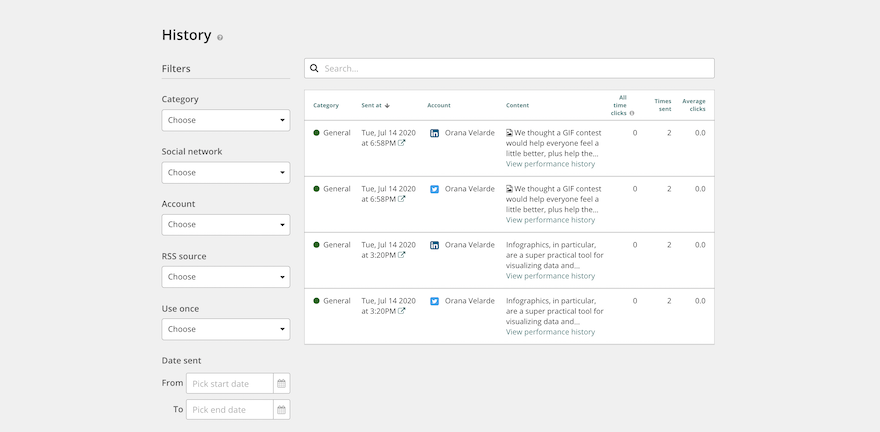
The history section. This is not an analytics tool at most, you can see how many times a post was shared and how many clicks it got. The motoring works the same way as the library.
MeetEdgar resolves your social media stress and turns it into social media accomplishments with features designed to remove the time-consuming part of managing the content on all of your networks. MeetEdgar makes automate content for your Facebook, Twitter, Instagram, Pinterest, and LinkedIn accounts.
Meet Edgar makes an art out of social media content planning. And economical than their competitors. I like to select it for my regular use. And it has a Chrome add-on you can use to collect content, it does not work with tweets. There is no other way to collect a tweet, and schedule to retweet it later.
1.Can Edgar shorten my links automatically or track clicks?
2.Will my followers see the Published by MeetEdgar tag on my Facebook posts?
3.Does Edgar work with Instagram?
Watch the tutorial video below: