Openshot Video Editor Basics
An award-winning open-source video editor. It is a simple and powerful video editor freely licensed to use, copy, study and change the software in any way. The source code is openly shared so anyone can improve the design of the software.
The project was launched in 2008 by Mr. Jonathan Tomas. It is absolutely free and friendly to use as a video editor. And this software comes in the top 5 video editor list. It is available on Linux, Mac, and Windows. You can download your videos without any watermark.
With the open shot, you can make stunning videos, films, and animations quickly and easily without any professional background in video editing. Even if you are a beginner. The main highlights are It’s an interface with user-friendly and many more features. It is quite easy and with few steps, you can download this software.
The original author is Mr. Jonathan Thomas. The Developers are OpenShot Studios, LLC. Operating systems are Linux, macOS, and Windows.
The website is www.openshot.org
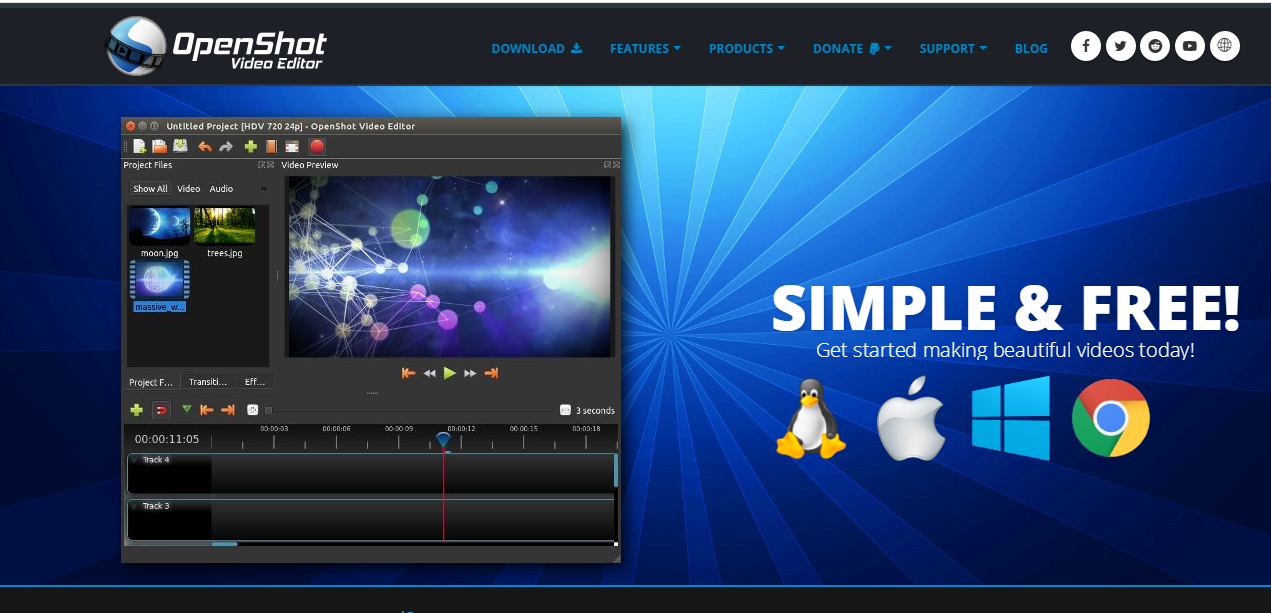 The web page of openshot (picture.1)
The Main Features of Open shot
- Cross-Platform:-OpenShot is a cross-platform video editor, which means you can save one video project in one OS and easily open it on another platform, supporting Linux, Mac, and Windows.
- Unlimited Tracks:-By default there are 5 Tracks in the timeline area. We can add as many layers or tracks to the timeline as you need for adding watermarks, background videos, audio tracks, Logos, and more.
- Title Editor:-In openshot adding titles to your videos is very easy you can add animated titles also. Use one of their templates, or make your own.
- Edit Video:-First bring files to the profile area. Drag and drop video, audio, or images from your Libraries. Then drag to the Track area. It's that easy to get started with video editing.
- Trim & Slice:- Can Quickly trim down videos, OpenShot has many easy ways to cut your video.
- Video Effects:- Video effects engine features, remove and add the background from or to your video, invert the colors, adjust brightness, and more.
- 3D Animations:- Can give Beautiful 3D animated titles and effects, such as snow, lens flares, or flying text.
- 70+ Languages:-In OpenShot there are almost 70 above different languages available and can be translated online with LaunchPad.
- Animation & Keyframes:- Openshot has a powerful animation framework, with this you can fade, slide, bounce, and animate anything in the video project.
- Audio Waveforms:- You can separate audio and can delete or add audio to videos.Can visualize audio files as waveforms, and even output the waveforms as part of your video.
- Slow Motion & Time Effects:-Are Controls the power of time, reversing, slowing down or slow motion, and speeding up video.
- Simple User Interface:-Easiest and friendliest video editing software ever! Without a watermark of Openshot.
How to use Open shot?
- First, you need to download openshot in your system.
How to Download Open shot?
- Open the web browser and type https://www.openshot.org/download/
- And download the open shot
- Now you will reach the landing page open shot. From there as per your system requirements you can download.
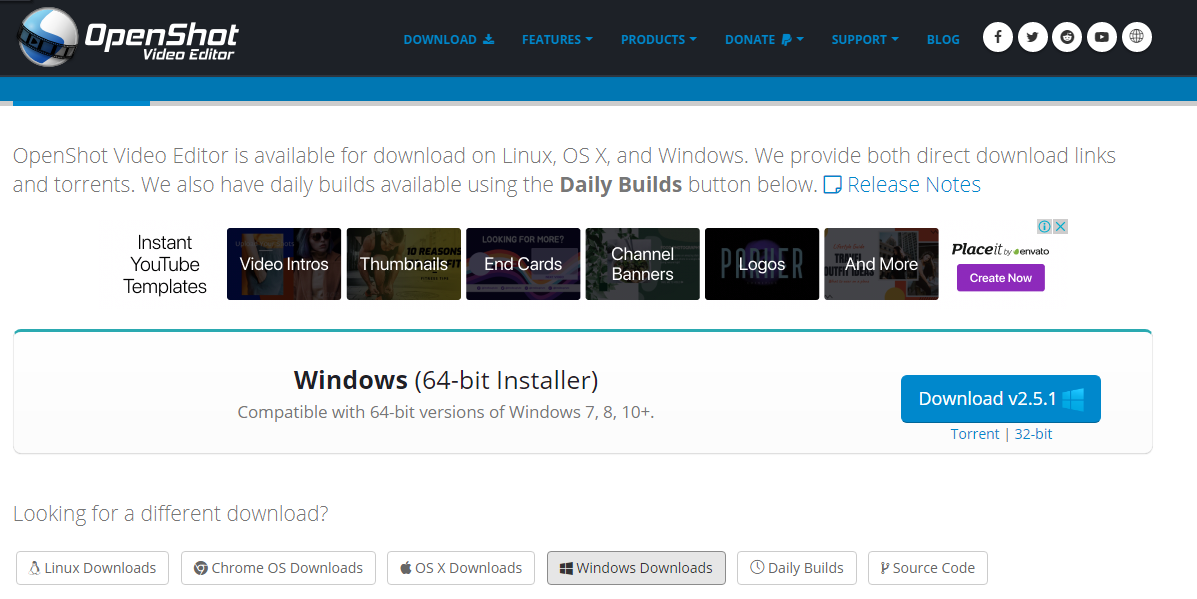 The landing page of Openshot (picture.2)
How to Edit Videos in Openshot?
- Open the interface of openshot video editor
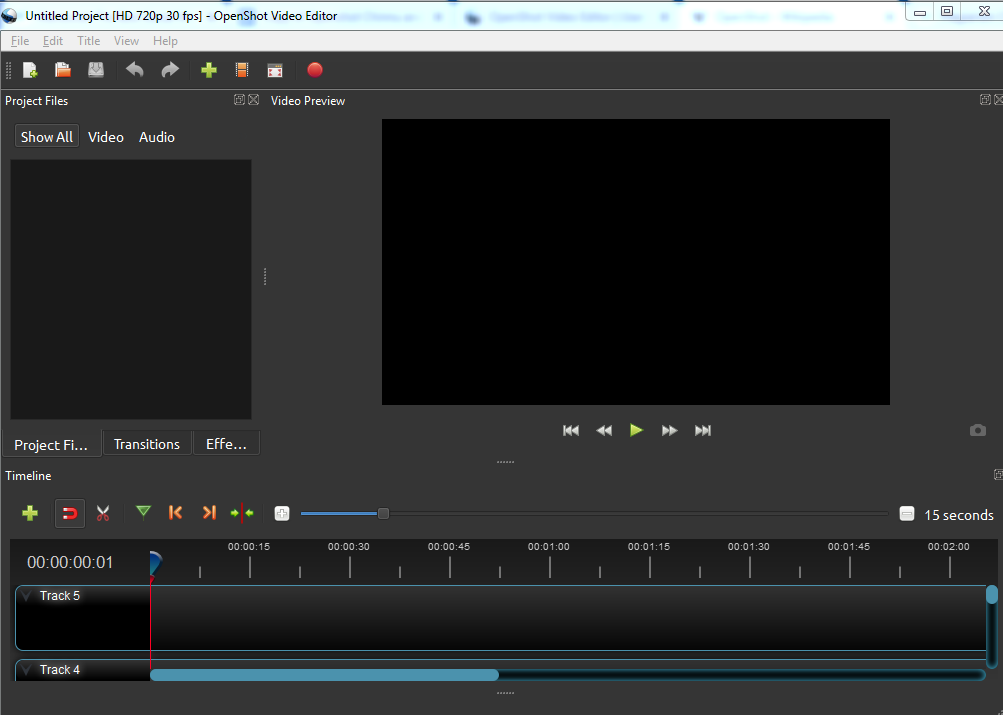
The interface of openshot(picture.3)
- After download opens the interface of open shot. This is the interface of the open shot (Refer to pic.3.)
- In this interface, there is a project file on the left side and a video preview on the right side to show a video preview.
- We have to click over the green play button on the preview side. And project timeline near the bottom of the screen.
- By default have 5 timeline tracks.
- If you want to add more tracks just hit the + icon showing down to the timeline and you can add or else from the drop-down showing the left side of the track through also you can add the track.
- If in case you want to remove any track just right-click and hit remove the track.
Let’s start with how to edit videos.
Open the Open shot Video Editor :
- First videos, music, or images you have to bring to the project file area. This is the project file widow (refer to picture4)
- Now the project file is empty you can add your own media file directly grab and drag to project files from libraries or you can import files by simply hitting the + icon showing the main bar at the top and you can import or else right-click the project file area and hit +icon and grab and drag or import as per your wish.
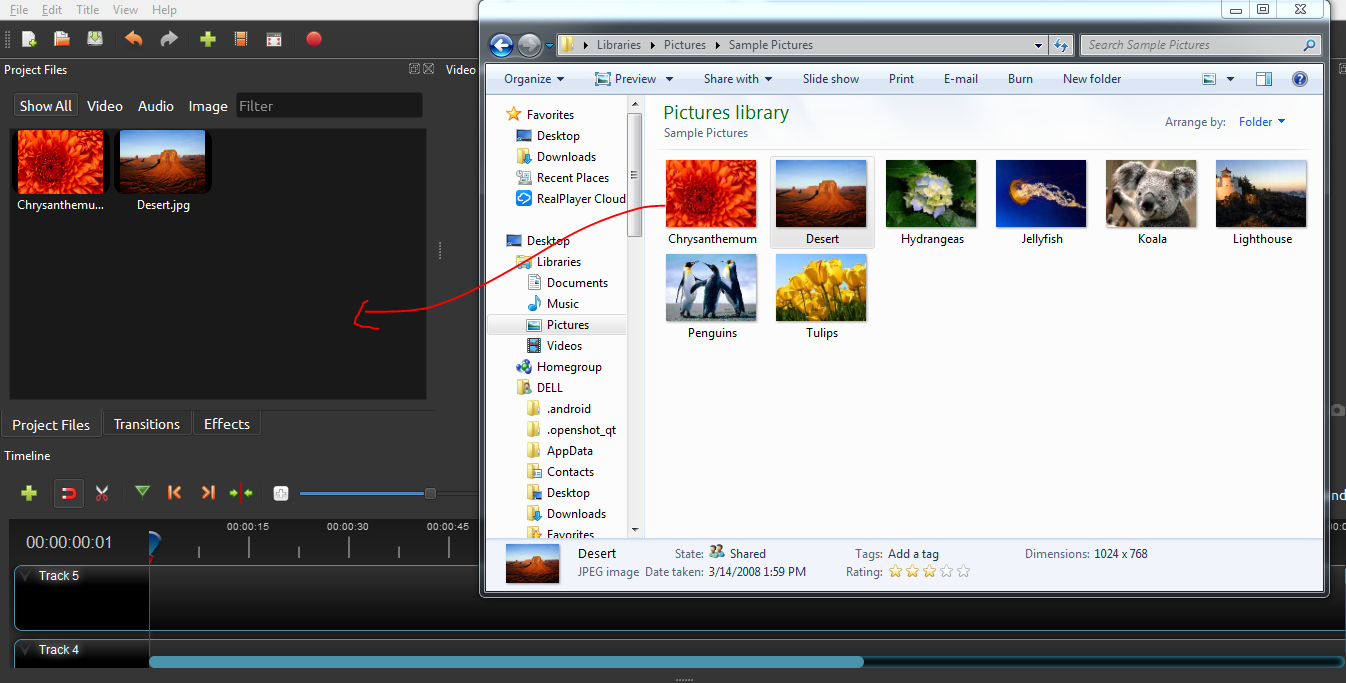 (picture.4)
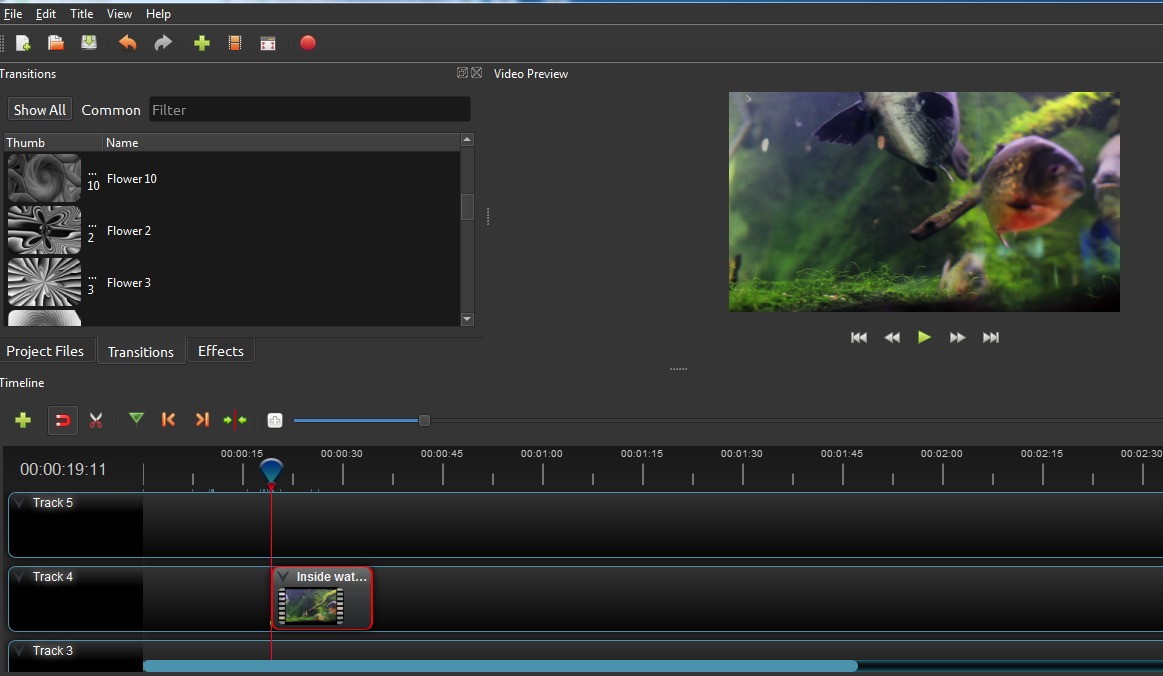
- Once added the video, audio, and image files into the project file you can drop these files on the timeline. These are represented by blocks called clips. It contains several tracks to composing your final video.
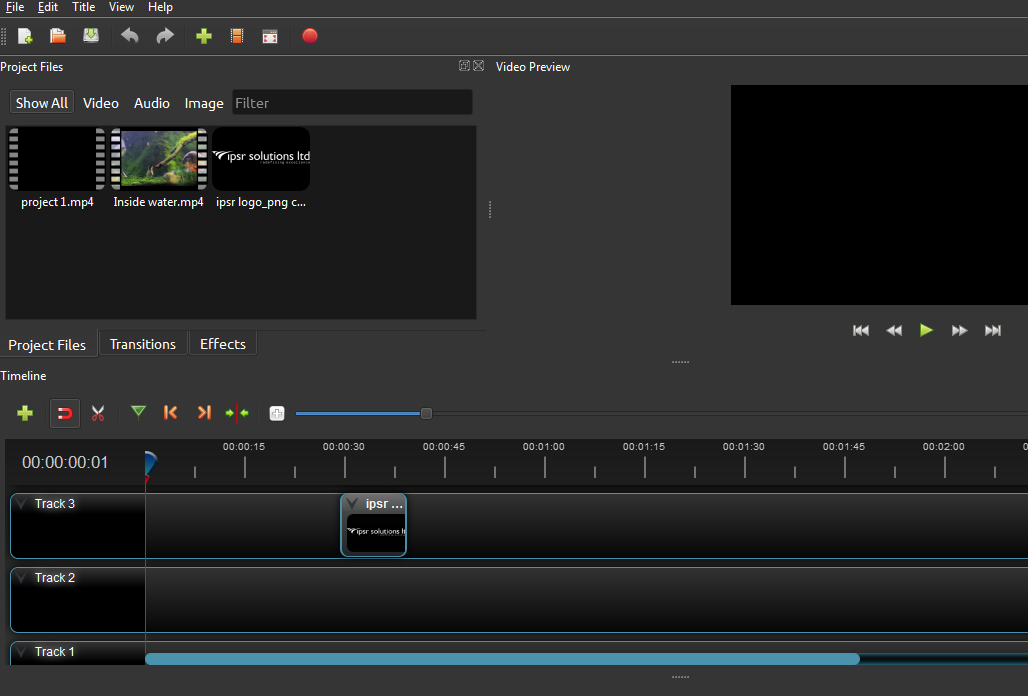 (picture.5)
- Just I am going to drag one video files to track 4 or grab to 3 (refer to pic.5)
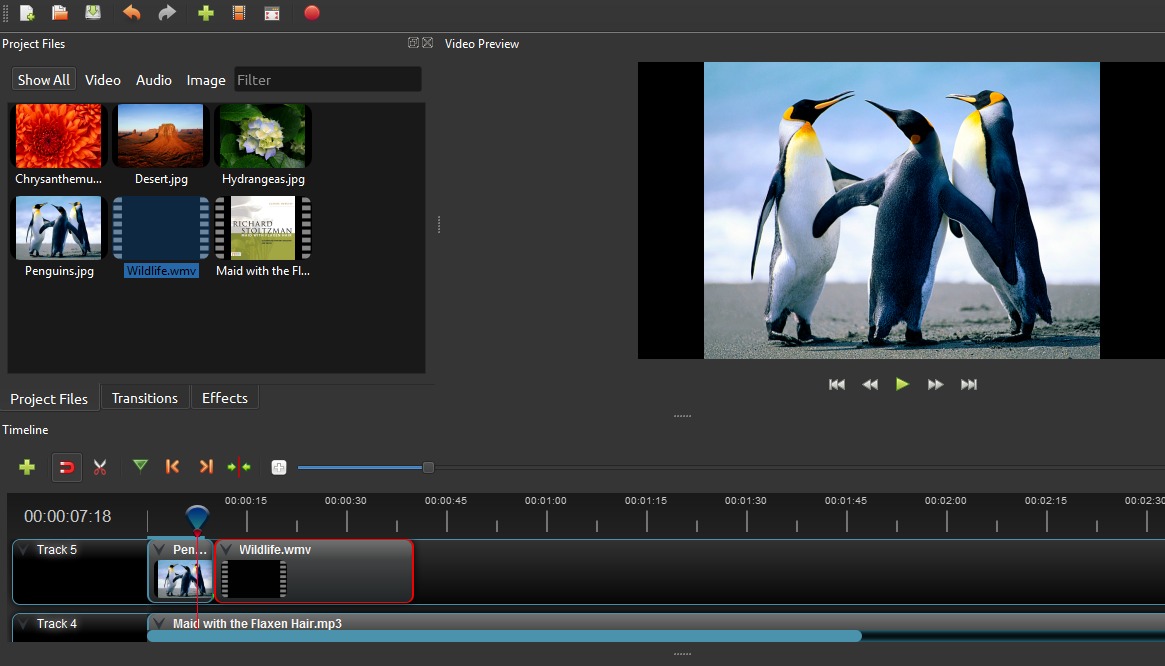
- Now grab the play head to forward showing in the timeline and hit the green play button in the preview area to see a video preview. Now we can bring the audio clip to track 3 or on a different track. If you want to add images, add images to the video track after or before the video.
 (picture.6)
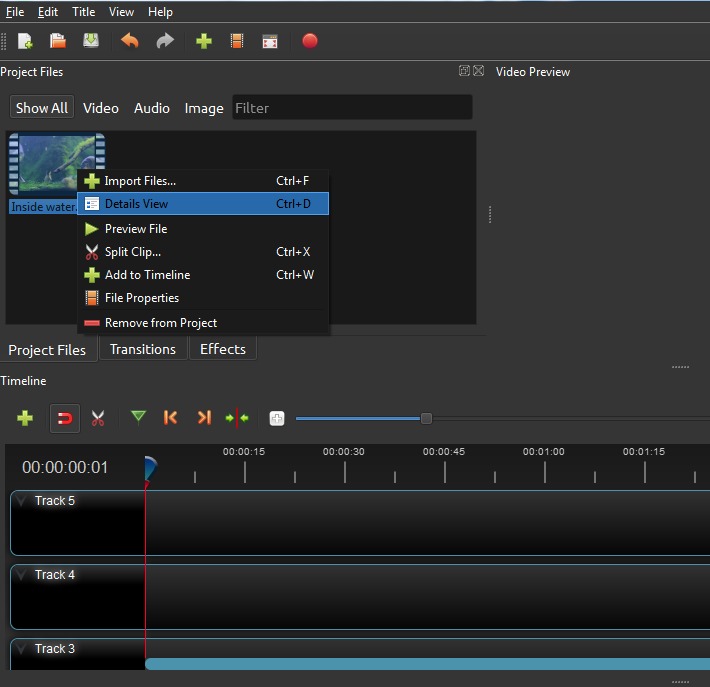
- If you want to remove the clip just right-click and remove the clip.
 (picture.7)
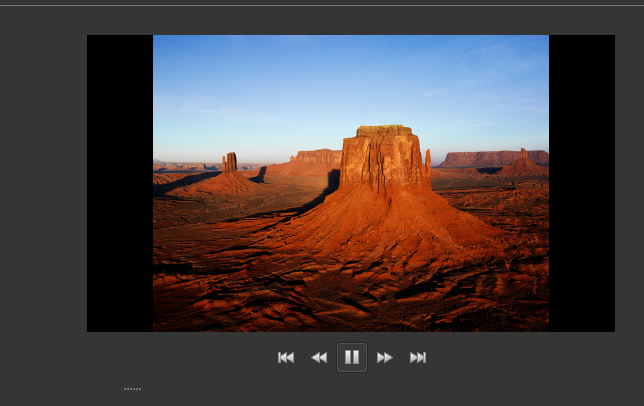
- To check content in detail you have to use video preview on the right.
To edit the video: Trimming, splitting and cutting Splitting the video :
- Before dragging to the timeline just right-click the video you will get another window and select clip to split the video and just hit the play button and end the video where you want to make the clip endpoint.
- And click create to make a clip.
- In optional you can give for the clip you can give name before hitting create. In the same way, you can make clips as much as you need.
 Splitting (picture.8)
Trimming Video
- If you want to trim the video just keep the play head where you want to trim just right-click from there and just select keep right side or keep left side or keep both(refer pic.9). Whatever you needed.
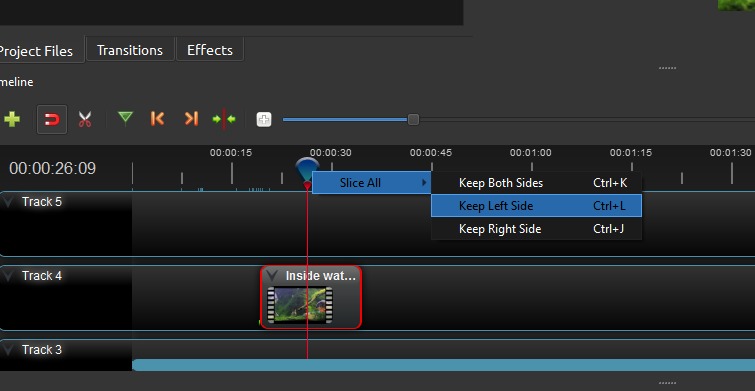 Trimming(picture.9)
Remove Audio from the Clip
- If you want to separate audio from the video just right-click from the video select separate audio hit single clip now audio will show in a separate track from there you delete or remove audio.
- If you want to add another audio to the timeline and you can add it to the clip.
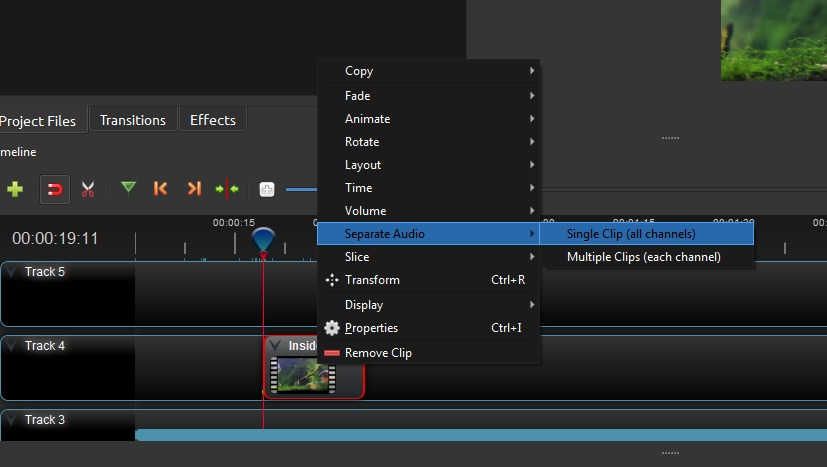 Separating audio (picture 10)
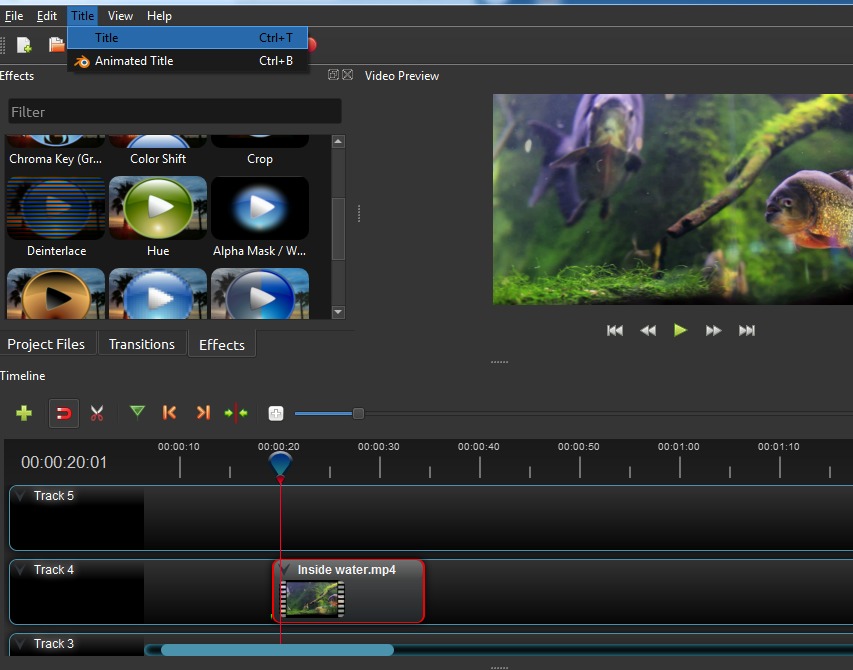
How to Add a Title to the Timeline:
- You can add the title or animated title to the video.
- Just go to the top left of the main bar of the project file area and hit title from options select title or animated title(refer pic.11).
- We need to click on the ‘title’ menu and then click on titles here you can see some title templates are provided just select one from these then you can rename the title.
- Here actually put the exact name from here we can select different font sizes to select the font and font size and choose the font color and also font background color now we can save this now it will be in our ‘project files’ tab.
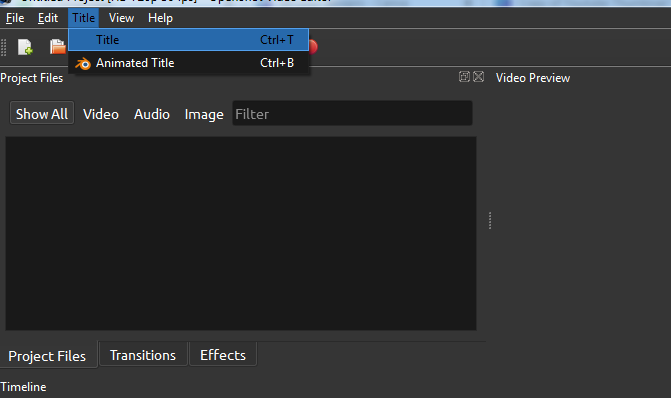 Add a title (picture 11)
Fade in and Fade out
- Select the video in the track and right-click dialogue box appears to click on fade into start then click on the start of the clip then fade in fast or fade in slow now you can see the fade in the video
- We can also add a fade-out now we have to go to fade and select the end of the clip and choose to fade out fast
- This is how we can add fade in or fade out to any video as we wanted(refer to Pic 12).
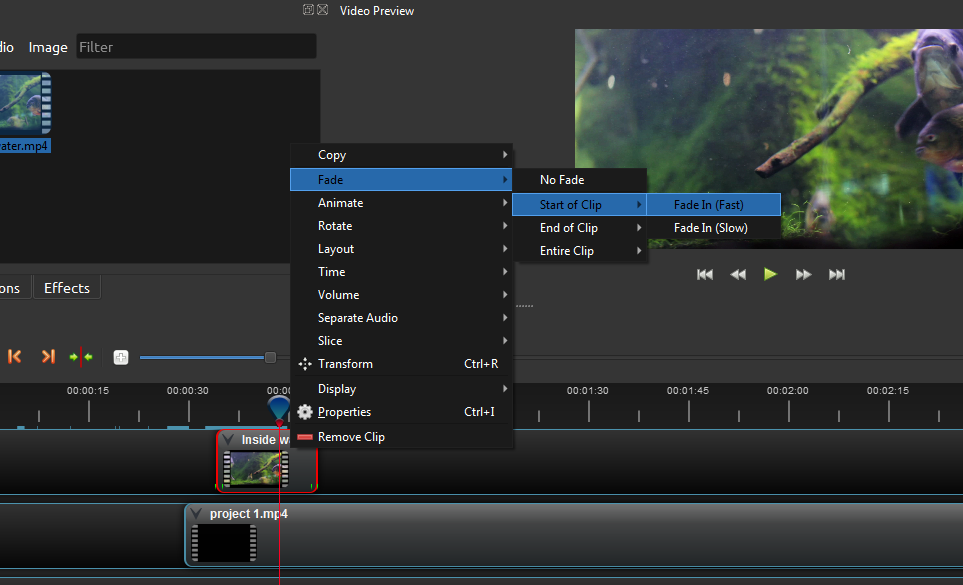 Fade in or Out (picture 12)
Openshot Transition
- In the openshot, we can add a transition effect between the 2 videos.
- First, add 2 videos into the timeline to show the transition effect. to show transition simply drag one video and drop to another video.
- You can see the transition effect after a click on the play button at the right and show you see a very slow transition effect.
- We can also make the transition fast by resizing its size by drag it from corners now you can see a fast and smooth transition.
- There is another method to add transition right click on the video and then animate then end of the clip then center to edge and select center to right and in this video just do in starting of the clip then right-click on the video and then animate then start of the clip then edge to center to left to center.
- Let's go through the video there is also another method eg transition tab there are a lot of transition here simply select the transition and drag it and drop on video and resize it accordingly
- So these are the 3 ways to add transitions.
 (picture.13)
Time-Lapse Effect in Video
- Time-lapse Effects in video and reduce video trimming and slow-motion effect and increase video timing.
- Now let's see the video normally.
- To create time-lapse right click on the video and then go to time then go to fast select forward ’8x’ or you can select accordingly.
- Now you can see the video duration is now shortened.
- Check the video now.
- If your video now will show as lagging while playing but there will not be lagging after exporting the video.
Slow-Motion Effect in Video
- Slow-motion effect and increase video timing. Now let's see the video normally.
- To create slow-motion right-click the video and go to time then slow then forward and select ‘¼’ now see the duration as increased now check the video while playing you can see the slow-motion effect has created.
 (picture.14)
How To add a Logo to the Video
- To add a logo to the video first you need to bring the logo to the project file area and drag the file to timeline track keep on separate track right-click from the clip and go to layout and select ¼ top right or top left or wherever you need to show the logo. (refer pic 15)
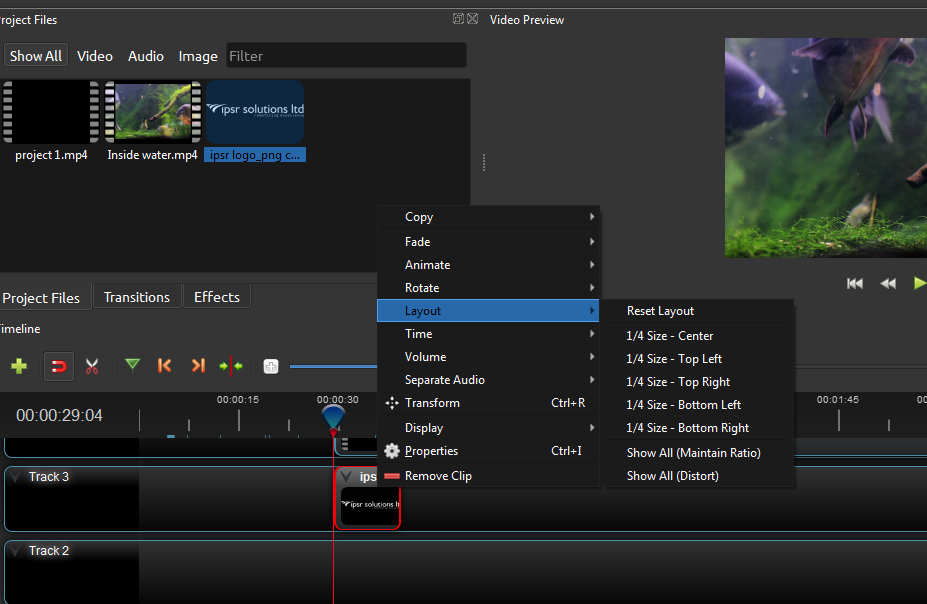
Adding logo (picture 15)
Green Screen or Chroma Key
- With this, we can change the background of any green screen video and as a background, we can use any image or any video or jpg image as a background.
- The background file will be placed below our green screen video track whether it is an image of any video file or green screen will be placed on top then we can click on green screen video then we click on the ‘effects’ tab and then select ‘chroma key’ and drag and drop to video and then right-click on letter ‘C’ icon and click on properties double click on ‘key color’.
- Now we choose a color click on the color picker and choose the green screen video color, then click on select most of the green color is already removed.
- One thing to notice is we have to place our pointer at to start of the video otherwise this effect will not apply to the whole video .
- If you put the pointer on anywhere else then we need to adjust the fuzz to remove the remaining green color as you can see on edge.
- Check the video so to remove this green color we need to adjust the fuzz double click on the fuzz and set it to 200.
- Now check the video green color will be removed from the video.
 (picture.16)
How to Export Video
- To export, we need to click on ‘export video’ (red button on the top left of screen) to give any name to the file.
- Now select the folder where you want to export the video profile ‘all format ‘(you can also select other formats from dropdown ) target ’h.264’ and the ‘video profile’ which we selected on starting set quality as high then click on ‘export video’ then your project will start downloading as you can see we will play it after exporting complete.
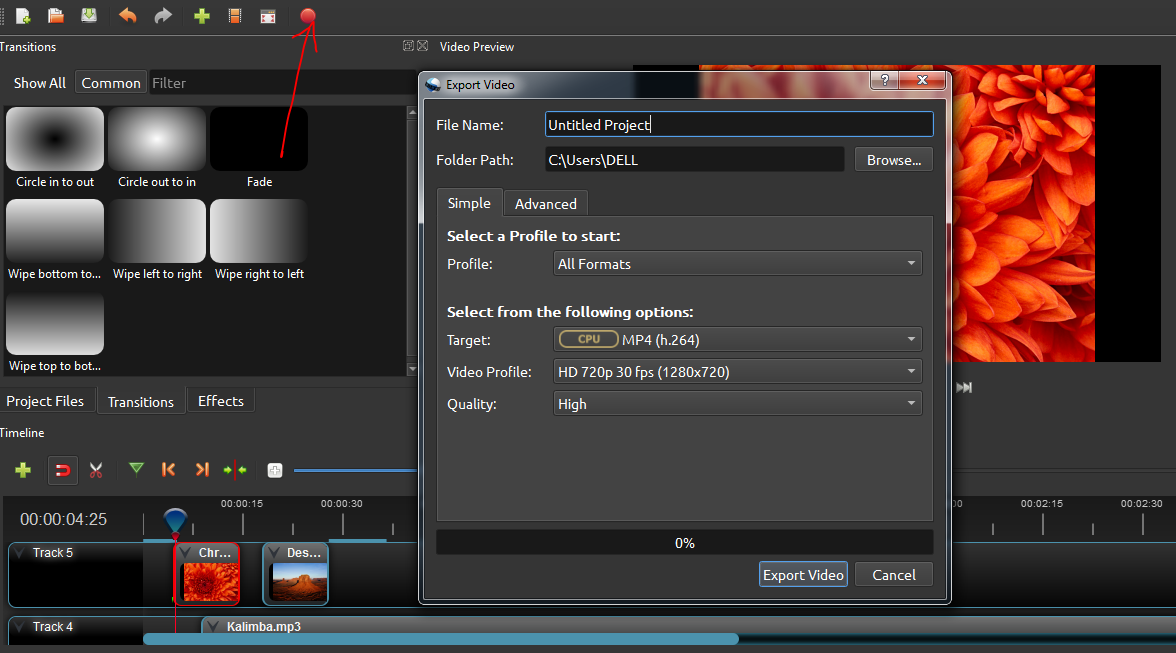
Export video(picture.17)
Here's a tutorial on how to use Openshot video Editor